
Trying to post Instagram Reels on the fly is a recipe for stress. We’ve all been there. It rarely leads to your best work and almost guarantees you’re not posting when your audience is actually online.
Imagine batching an entire week's worth of Reels in a single afternoon, then letting a tool handle the publishing. That’s the power of a solid scheduling workflow. It turns your content strategy from a daily scramble into a real strategic advantage.

Why You Need a Reels Scheduling Workflow
Let's be real: consistently creating and publishing great Instagram Reels is a grind. One minute you're trying to nail a transition, the next you're frantically trying to find a trending audio track that fits your brand. This kind of reactive posting leads to burnout and, worse, an inconsistent feed that stalls your growth.
Building a dedicated scheduling workflow completely flips the script. Instead of scrambling to post something right now, you can plan your content calendar weeks or even months out. This frees up so much mental energy, letting you focus on being creative and actually engaging with your community.
Gain a Strategic Advantage
The perks go way beyond just saving a bit of time. When you schedule your Reels, you get precise control over your content strategy. You can perfectly time your posts to align with marketing campaigns, product launches, or seasonal events—all without the last-minute panic.
Even more importantly, it lets you post at the absolute best times for your audience. Your followers aren't always scrolling when you have a free moment. A scheduling tool makes sure your content goes live when they are most likely to see and engage with it, maximizing every post's reach and impact.
The numbers don't lie. Instagram Reels pull in a massive global audience of over 2 billion users every single month. The algorithm heavily favors this format, giving Reels roughly 2.25 times more reach than a standard photo post. Scheduling is how you make sure you’re tapping into that huge audience at exactly the right moments.
Direct Scheduling vs. Reminder Notifications
Once you decide to start scheduling, you'll run into two main methods. Knowing the difference is crucial for building a process that actually works for you.
Direct scheduling is the dream. You upload your Reel, write the caption, pick a cover image, and set a time. The tool then publishes it automatically, no further action needed from you. It's the true "set it and forget it" approach that gives you your time back.
Reminder notifications are the old-school way. A tool sends a push notification to your phone at the scheduled time, but then you have to manually open the app, paste your caption, and hit "publish." It’s better than nothing, but it still chains you to your phone at specific times.
For anyone serious about growth—creators, brands, agencies—direct scheduling is the only way to go. It removes that final manual step, eliminates the risk of missing a post because you got busy, and delivers true automation.
Modern social media management platforms like OneUp are built around this direct publishing model for a reason. They offer powerful features that go way beyond just hitting "publish" for you. For Reels, you can automatically add hashtags to the first comment, tag locations, mention other users, schedule your post as a collaboration, and even tag products if you have an Instagram Shop. This is how you turn scheduling from a simple task into a fully optimized content machine.
Direct Scheduling vs Reminder Notifications at a Glance
Still not sure which method fits your workflow? This table breaks down the key differences to help you decide.
| Feature | Direct Scheduling (e.g., OneUp, Meta Business Suite) | Reminder Notifications (Legacy Method) |
|---|---|---|
| Workflow | Set it and forget it. The tool publishes automatically. | Set a time, get a phone notification, then post manually. |
| Convenience | High. Schedule anytime, anywhere. No need to be online at post time. | Low. You must be available to post when the reminder goes off. |
| Reliability | Very high. Eliminates human error and missed posting times. | Moderate. Risk of missing notifications or being unavailable. |
| Best For | Marketers, agencies, busy creators, and anyone managing multiple accounts. | Solo creators who want a simple reminder system. |
Ultimately, choosing direct scheduling is about investing in a more efficient, reliable, and stress-free content strategy. It lets you focus on creating great Reels, not on watching the clock.
Using Instagram's Built-In Scheduling Tool
If you're just dipping your toes into content planning or only have one account to worry about, Instagram's own scheduling tools are a great, no-cost way to get started. Meta gives you two options: scheduling right from the Instagram app or using the more comprehensive Meta Business Suite on your computer.
It's the perfect way to get a feel for scheduling your Reels without shelling out for a third-party service right away. You can line up your videos ahead of time and make sure you're posting when your audience is most active, all without being chained to your phone. It has its limits, but it’s a solid first step for any creator trying to be more consistent.
Scheduling Directly in the Instagram App
The quickest method is baked right into the app you already use every day. Since it's part of the normal Reel creation flow, it feels super intuitive. This is perfect for those times you finish editing a masterpiece on your phone and want to get it scheduled immediately.
One quick heads-up: you'll need an Instagram professional account (either Business or Creator) to see this option. If you’re on a personal account, it simply won’t be there.
Here’s how it works:
- Kick off a new Reel. Tap the
+icon, choose 'Reel', and get your video ready with all the usual edits—sound, text, filters, you name it. - Jump into Advanced Settings. On the final screen where you add your caption, scroll all the way down and tap “Advanced settings”.
- Find the scheduling option. In this menu, you’ll spot a toggle for “Schedule this reel”. Flip it on.
- Pick your time. A calendar will pop up. Choose the exact date and time you want the Reel to drop. You can schedule up to 75 days in advance, which is plenty of runway for most people.
- Lock it in. Head back to the caption screen and tap the blue “Schedule” button. That’s it! Your Reel is in the queue.
Need to check on your scheduled posts? Just go to your profile, tap the hamburger menu (the three lines), and hit “Scheduled content” to see, edit, or delete anything you’ve lined up.
Using Meta Business Suite for More Control
If you prefer working on a desktop or you’re also juggling a Facebook Page, the Meta Business Suite is your best bet. The interface is a bit more fleshed out, and it lets you cross-post to Instagram and Facebook at the same time—a massive timesaver.
The steps are just as easy:
- Log into your Meta Business Suite and find the “Create Reel” button.
- Pick which accounts to post to (Instagram, Facebook, or both).
- Upload your video and craft your caption. Typing on a real keyboard is a game-changer for longer descriptions.
- From here, you can add a custom thumbnail, trim your video, and even add collaborators.
- Look for the publishing options, choose “Schedule”, and set your date and time.
- Hit the big blue “Schedule” button, and you’re done.
Key Takeaway: Instagram’s native tools are fantastic for basic scheduling. But they stop short of offering the more powerful features you’ll find in dedicated social media tools. For instance, you can’t schedule your first comment or set up an approval process for your team.
The Honest Limitations of Native Scheduling
While free is hard to beat, Instagram's built-in tools come with some serious drawbacks, especially as your social strategy gets more sophisticated. Once you start managing multiple brands or need real automation, you'll feel the pinch.
You won't find features like bulk scheduling, creating content categories for your different marketing pillars, or automatically recycling your top-performing evergreen posts. These are the functions that turn scheduling from a simple chore into a powerful content engine.
For that kind of firepower and efficiency, you'll want to explore a platform like OneUp, which is built from the ground up to handle these more complex workflows.
How To Schedule Reels and Automate Your Workflow with OneUp
While Instagram’s built-in scheduler is a decent start, you'll quickly hit a wall if you’re managing multiple accounts, working with a team, or trying to build a real content machine. For social media managers and agencies, a dedicated platform like OneUp isn't just a nice-to-have—it's how you scale your strategy and get your time back.
This is where you graduate from basic scheduling to full-on workflow automation. OneUp is built to solve the headaches that pop up when you're juggling different clients or content themes. It turns a bunch of tedious, separate tasks into one smooth process.
The whole idea is to create a simple, repeatable system: upload your content, make your edits, and schedule it for the perfect time.
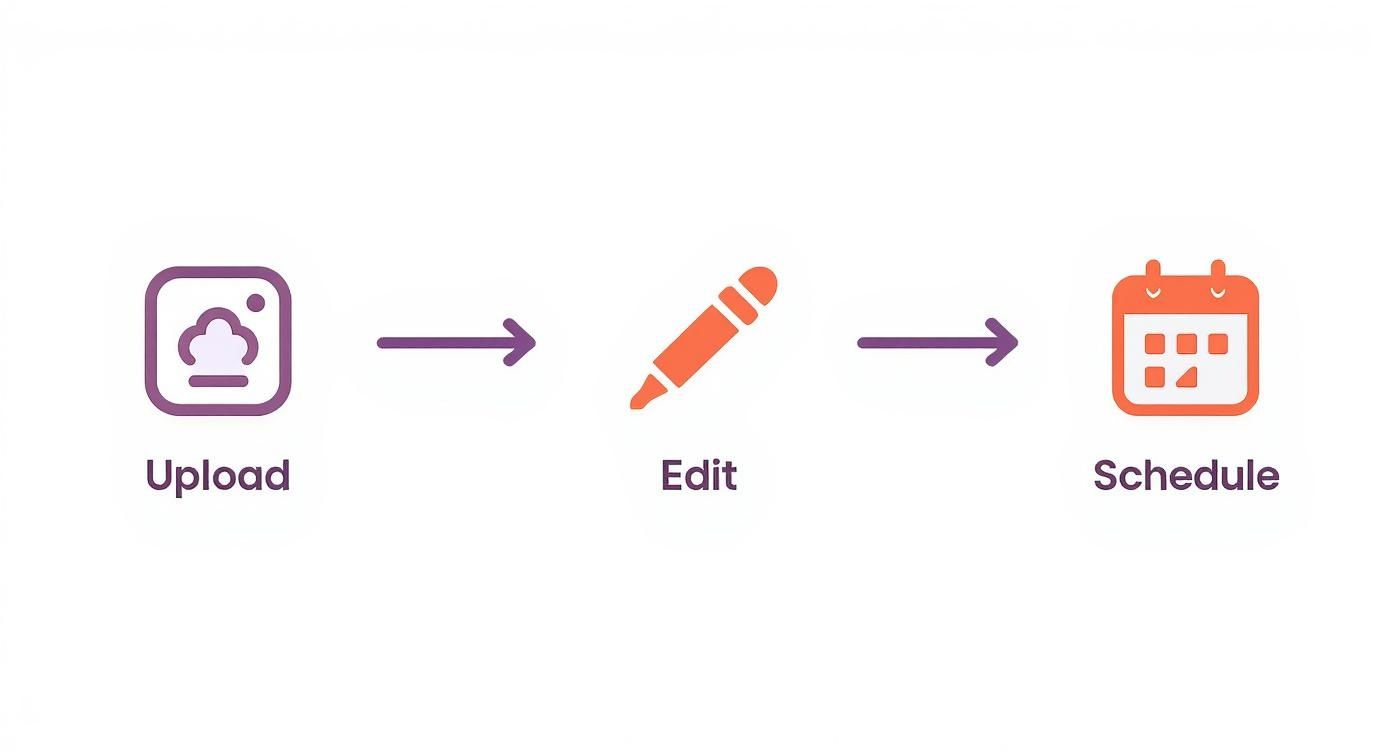
This workflow shows how a tool like OneUp brings everything into one place. No more jumping between apps or losing track of files. It’s all about saving time and cutting down on mistakes.
Go Beyond Basic Scheduling
OneUp is packed with features designed for pros. For example, you can automatically schedule your first comment right along with your Reel. This is a game-changer for keeping your captions clean and tucking your hashtags away neatly where they can still do their job. You can also generate AI captions with a single click, saving you time on copywriting.
You also get a powerful visual calendar that shows all your scheduled content across every social network, not just Instagram. This bird's-eye view is awesome for spotting content gaps and managing campaigns without constantly switching browser tabs.
For agencies, the post approval workflow is a must. You can draft a Reel, then send it to a client or manager for approval right inside the platform. It kills the endless email chains and gives everyone a clear look at what's coming up.
Another great feature is the ability to create categories for your posts. You can group accounts by client or organize content by themes like "Educational," "Behind-the-Scenes," or "Promotional." It’s a simple way to make sure you have a balanced content mix.
Advanced Automation and Content Management
OneUp's automation is where it really shines. Imagine having a library of your best evergreen Reels that the platform can automatically repeat at set intervals. This is huge for filling gaps in your calendar and making sure your top content keeps reaching new people without you lifting a finger.
The platform also supports bulk scheduling from a CSV or Google Sheet, which is a massive time-saver. Instead of creating hundreds of posts one by one, you can map out a whole month of content in a spreadsheet and upload it in minutes.
Here are a few other features that make life easier:
- Canva Integration: Design your Reel covers right inside OneUp. Just click the Canva button, create your graphic, and it pops right into your post. No downloading and re-uploading needed.
- Location Tagging: Add a location to your Reels to boost local discovery, just like you would in the Instagram app.
- Custom Thumbnails: Upload a custom cover image to keep your Instagram grid looking polished and on-brand.
- Chrome Extension: Schedule Reels directly from your browser, making it easy to share content you discover online.
OneUp also makes teamwork simple. You can add unlimited team members and set specific roles and permissions. Give a junior team member access to draft posts for just one client, while a manager has full approval rights for everyone. To see how these features break down, you can check out the full OneUp's pricing and features.
To help you see the difference, here's a quick comparison of what you get with Meta's free tool versus the more advanced features in OneUp.
Feature Comparison Meta Native Scheduler vs OneUp
| Feature | Meta Business Suite | OneUp |
|---|---|---|
| Schedule First Comment | No | Yes |
| Post Approval Workflows | Limited | Yes |
| Bulk Scheduling (CSV) | No | Yes |
| Repeating/Evergreen Posts | No | Yes |
| Content Categories | No | Yes |
| Canva Integration | No | Yes |
| Schedule to Other Networks | Facebook & Instagram only | Facebook, IG, X, LinkedIn, TikTok, YouTube, Pinterest, and more |
| Team Member Roles | Basic | Advanced & Customizable |
| AI Caption Generator | No | Yes |
| Tag Products & Collaborators | Collaborators only | Yes, both |
This table makes it clear: while Meta's tool is fine for casual use, OneUp provides the professional-grade features needed to manage a serious social media presence efficiently and collaboratively. It’s built for those who need more control, automation, and a streamlined team process.
Getting the Technical Specs Right for Your Reels
There’s nothing worse than spending hours getting a Reel just right, only to see it fail during the upload or look warped and blurry once it’s live. It’s a massive headache, but technical errors are almost always avoidable if you know the rules of the game.
Getting your video specs right from the very beginning isn't just a suggestion; it’s a non-negotiable step for a smooth scheduling workflow.
Think of these specs as the blueprint for your Reel. Just like you wouldn't build a house with the wrong materials, you can't expect a crisp, professional-looking Reel from an incorrectly formatted file. Following these guidelines ensures your content looks exactly as you intended on everyone's screen.
Your Essential Reels Technical Checklist
Before you even think about hitting "schedule" in a tool like OneUp, run your video file through this quick checklist. These specs cover the most common reasons a Reel might fail to upload or just look… off.
Here’s exactly what Instagram wants to see:
- Aspect Ratio: The sweet spot is 9:16. This is the classic vertical, full-screen format made for smartphones, ensuring your video fills the entire screen without any of those ugly black bars.
- Resolution: Always aim for 1080 x 1920 pixels. This gives you sharp, high-definition video that looks amazing on mobile devices without creating a huge file that takes forever to upload.
- File Format: Stick with MP4. It's the most widely supported and efficient format for video on the web, period.
- Video Length: Your Reel needs to be between 5 and 90 seconds long. Anything shorter or longer won't be recognized as a Reel by Instagram's API.
- File Size: Keep your video under 1 GB. While you can go bigger for longer IGTV-style videos, Reels have a much tighter limit, especially when you're using third-party schedulers.
When you’re scheduling through a platform like OneUp, sticking to these specs is critical. The API that allows for direct publishing needs a file that meets Instagram’s exact standards. For example, a file with the wrong aspect ratio might get published as a regular in-feed video post instead of a Reel, completely tanking its intended placement and reach.
Why These Details Matter So Much
Ignoring these specs isn’t just about dodging an error message; it directly affects how people perceive your content and your brand. A video with a 4:5 aspect ratio, for instance, will show up in the Reels feed with distracting black space at the top and bottom. It instantly screams "amateur."
Likewise, a low-resolution video will look pixelated and blurry, cheapening your message no matter how good it is.
The goal is to create a seamless viewing experience. When your Reel's technical quality is on point, your audience can focus entirely on your content, not on distracting formatting problems.
The good news is that most video editing software, from Adobe Premiere Pro to CapCut, has export presets specifically for Instagram Reels or TikTok. Using these is the easiest way to guarantee your file is perfect every time. Just select the "1080p" or "Instagram Reel" export option, and the software handles the rest, giving you a ready-to-schedule file that will upload without a single issue.
Strategies for Scheduled Reels That Actually Get Views
Let's be real: figuring out how to schedule Instagram Reels is just step one. You can have the slickest workflow on the planet, but it won't do much for a Reel that just doesn't connect. Think of scheduling as the delivery truck—what matters is the package inside.
This is where your strategy comes into play. A perfectly timed Reel is good, but a perfectly timed Reel with a killer hook, a caption that sparks conversation, and a cover image that stops the scroll? That’s how you build a real following. Time to think beyond the calendar.
Craft Captions That Drive Conversation
Your caption is prime real estate. Don't waste it by just describing your video. Use it to start a conversation. Ask a direct question, offer a surprising take, or get your viewers to share their own experiences.
The video grabs their attention; the caption is what holds it. A simple prompt like, "Have you ever tried this? Tell me how it went!" can make a huge difference in your comment count.
This is where a tool like OneUp really helps. Not only can you schedule your first comment to hide hashtags, but you can also use its built-in AI assistant to generate engaging captions and ideas based on a simple prompt. This keeps your main caption clean and focused on that conversational prompt, making it way more inviting for people to chime in.
Design Covers That Stop the Scroll
The first thing anyone sees of your Reel—whether it's on their feed, the Explore page, or your profile grid—is the cover image. A blurry, confusing, or just plain boring cover is a surefire way to get scrolled past.
Your cover has three jobs, and it needs to do them instantly:
- Grab attention with strong visuals or bold text.
- Clearly signal what the Reel is about.
- Fit in with your brand's overall look and feel.
Pro Tip: Never, ever rely on a random frame from your video. Always create a custom cover. Platforms like OneUp integrate directly with Canva, so you can whip up a polished, on-brand cover right inside your scheduling workflow. This one step can seriously boost your click-through rate.
Use Trending Audio the Smart Way
Jumping on a trending sound can give you a quick visibility bump, but only if it actually makes sense for your brand. Don't try to shoehorn your content into a trend that feels totally off. The trick is to adapt the trend to your niche, not the other way around.
Find an audio that's picking up steam and ask yourself, "How can I put my own spin on this?" When you mix a popular sound with your unique perspective, you get content that's both discoverable and authentic.
It's a powerful combo. We know that Reels generate 22% more engagement than regular video posts, largely because the algorithm loves pushing them to new audiences. Even small brands with under 5,000 followers often see Reels engagement rates hit 3.81%, which proves how great they are for discovery.
Find Your Unique Best Posting Times
Generic advice on the "best time to post" is a fine place to start, but it's not a real strategy. Your audience is unique. Their online habits are specific to them. The only way to find your sweet spot is to look at your own data.
Pop open your Instagram Insights and head to the "Audience" tab. You'll see exactly when your followers are most active, broken down by day and hour. Once you spot those peak windows, use your scheduling tool to hit them consistently.
This data-driven approach takes all the guesswork out of it. You’re no longer just posting whenever; you’re posting when your community is actually there and ready to engage.
Optimize Your Hashtag Strategy
Hashtags are crucial for helping Instagram categorize your content and get it in front of the right people. The problem is, a caption stuffed with hashtags can look a little spammy. That’s why scheduling them in the first comment is such a game-changer.
This keeps your main caption focused on the message while the hashtags do their job behind the scenes. The key is finding the right blend of broad, niche, and branded hashtags. If you need some ideas, check out OneUp's Instagram hashtag generator to find some relevant options. And as you scale, you might even start thinking about paid promotion, so it's worth understanding the nuances of choosing between TikTok and Instagram ads for promotion.
Ultimately, a winning Reels strategy is a mix of smart scheduling and genuinely good content. When you optimize every piece of the puzzle—from the cover to the caption—every Reel you schedule becomes a real opportunity for growth.
Got Questions About Scheduling Instagram Reels?
Even with the best tools, you're bound to run into a few questions when you start scheduling Instagram Reels. It's just part of figuring out a new workflow. Let's tackle some of the most common hurdles so you can schedule your content with total confidence.
From the dreaded "trending audio" dilemma to last-minute edits, here are the practical answers you're looking for.
What If I Need to Edit a Scheduled Reel?
Plans change. It happens. Sometimes a scheduled Reel just needs a quick tweak before it goes live.
If you're using Instagram's own in-app scheduler, you can find your post under "Scheduled Content" and make some basic changes, like updating the caption or pushing back the post time. It’s pretty limited, though.
For real flexibility, a tool like OneUp gives you way more control. You can see everything laid out on your calendar and just drag-and-drop posts to new time slots. Need to rewrite a caption, change the first comment, or even swap out the entire video file? No problem. You can do it all right up until the second it's supposed to publish. This is a lifesaver when campaign details shift or you catch a typo at the last minute.
Can I Still Use Trending Audio in Scheduled Reels?
This is the big one, and honestly, the answer is a little tricky. Because of how Instagram’s API works, you can't add audio from its trending library directly inside a third-party scheduling tool. The sound has to be part of the video file before you upload it.
So, here's the workflow that actually works:
- Find the trending audio you want to use inside the Instagram app.
- Jump over to an external video editor like CapCut to create your Reel and add the audio track there.
- Upload that final, finished video file (with the sound baked in) to your scheduling tool.
This approach makes sure your Reel goes live with the right audio without breaking any API rules.
The bottom line is this: the video file you upload to a scheduler needs to be 100% ready to go. All your edits, text overlays, and audio should be completely finished before you hit "schedule."
Why Did My Scheduled Reel Fail to Post?
Nothing is more frustrating than a post that fails to go live. But nine times out of ten, it’s a simple technical issue with the file itself.
The most common culprits are an incorrect aspect ratio (it has to be exactly 9:16), a video that's too short (under 5 seconds) or too long (over 90 seconds), or a file size that's too big (over 1 GB).
Using a platform like OneUp can save you a headache here, as it often flags unsupported files right when you upload them. Always double-check your video export settings against Instagram’s official requirements to make sure everything posts without a hitch.
How Do Team Approval Workflows Work?
For marketing teams and agencies, getting a manager or client to sign off on content is non-negotiable. Instagram’s native tools don't have a feature for this, which is where dedicated platforms really shine.
With OneUp, you can create a Reel and assign it to someone on your team (or even an external client) for approval. They'll get a notification and can view the post on a private, shareable link. From there, they can approve it with one click or leave notes for revisions. It keeps the entire feedback loop clean, organized, and—most importantly—out of your email inbox. For anyone working collaboratively, it's a game-changer.
Ready to go beyond just scheduling and build a powerful, automated content system? OneUp gives you all the advanced features you need, from scheduling your first comment and managing team approvals to recycling evergreen posts and bulk uploading content.
Start making your Reels strategy easier today. Head over to https://oneupapp.io to see how it all works.