Nailing your video format on Instagram isn't just a "nice-to-have"—it's a must. You need to stick to the right aspect ratios, resolutions, and file types if you want your content to look sharp and professional. The golden rule? 9:16 vertical for Reels and Stories, and 4:5 for Feed posts. Getting this right from the jump is a huge part of winning on the platform.
Why Perfect Instagram Video Formatting Matters
Getting your video specs right isn't just about making things look pretty. It's a clear signal to the Instagram algorithm that your content is high-quality and deserves a spot in front of more eyeballs.
When you upload a video that doesn't fit Instagram's preferred dimensions, the app has to either compress or crop it. That's when you see the dreaded pixelation, ugly black bars, or shots where the subject's head is cut off. It instantly makes your content look unprofessional and out of place, which can seriously hurt its reach.
Think of it from Instagram's perspective. They want to create a seamless, immersive experience that keeps people scrolling. A crisp video that perfectly fills the screen and plays without a hitch fits that goal. The algorithm is literally built to push content that makes the user experience better.
The Algorithm Loves Native Content
Ever since Instagram announced its major pivot to video, its recommendation engine has heavily favored content that looks like it was made for the app. In fact, since 2020, video has grown to make up around 60% of the time users spend on Instagram.
The algorithm prioritizes vertical, full-screen experiences, which is why Reels and Stories so often get explosive reach. This has forced smart content creators and social media managers to create 9:16 vertical masters for Reels and Stories, with separate 4:5 or 1:1 versions for the Feed.
This handy graphic breaks down the essential aspect ratios you need to know.
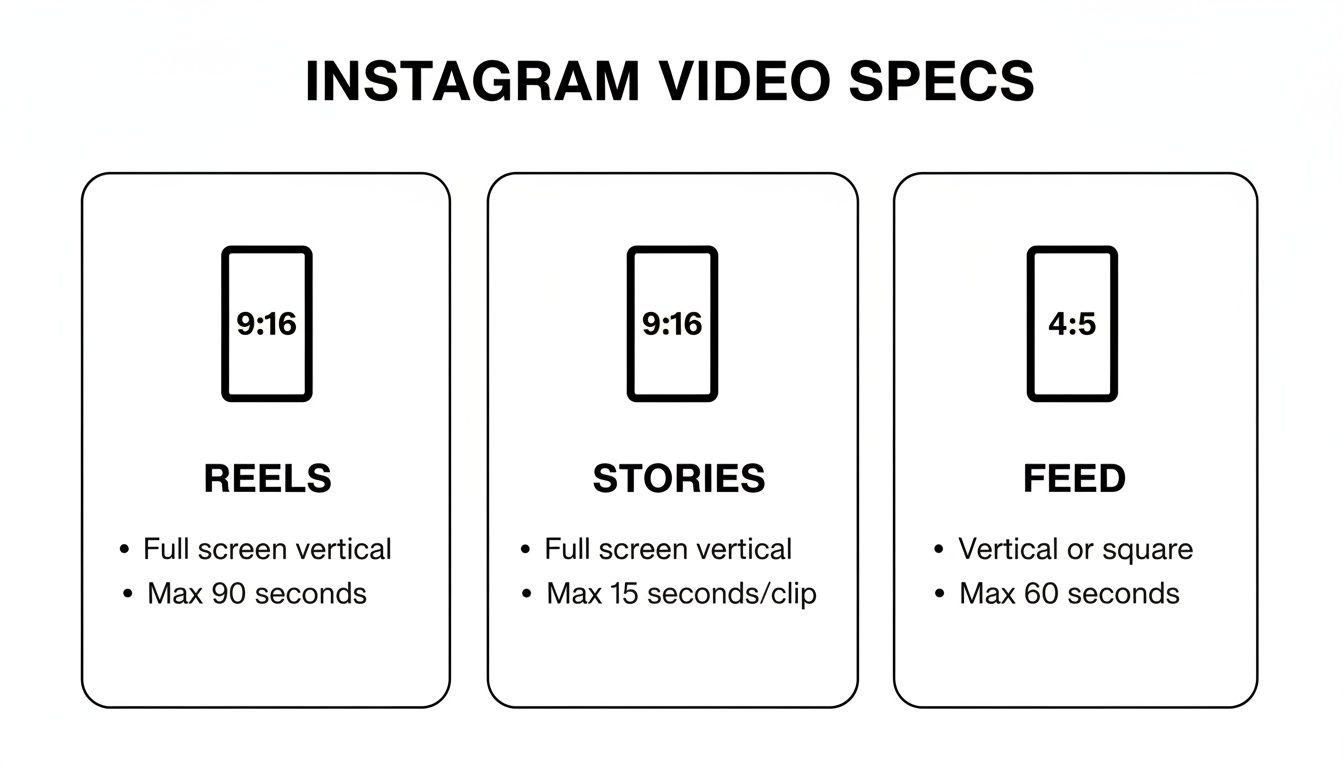
As you can see, vertical video is king. Both Reels and Stories demand the full-screen 9:16 format, while the Feed gives you a little more flexibility with a slightly shorter 4:5 ratio.
To make things even easier, here's a quick reference table with the key specs for each placement.
Quick Guide to Instagram Video Specs
| Placement | Aspect Ratio | Recommended Resolution (pixels) | File Type |
|---|---|---|---|
| Reels | 9:16 | 1080 x 1920 | MP4 or MOV |
| Stories | 9:16 | 1080 x 1920 | MP4 or MOV |
| Feed Post | 4:5 | 1080 x 1350 | MP4 or MOV |
| Feed Post | 1:1 | 1080 x 1080 | MP4 or MOV |
Sticking to these guidelines ensures your video looks its best, no matter where it appears on the platform.
Impact on Engagement and Brand Perception
Beyond just pleasing the algorithm, proper formatting has a real, tangible effect on how people engage with your content. A poorly formatted video can tank your metrics.
- Lower Watch Time: If your video is blurry or has distracting black bars, people are going to scroll right past it.
- Reduced Engagement: Important visuals or calls-to-action can easily get cropped out, meaning your audience might miss the whole point of your video.
- Negative Brand Image: Consistently posting janky, low-quality videos makes your brand look like it doesn't care or doesn't know what it's doing.
The first three seconds of your video determine whether a user will stop scrolling. If that initial impression is a poorly cropped, low-resolution mess, you've already lost the battle for their attention.
Ultimately, taking a few extra minutes to format your video correctly is one of the most fundamental things you can do for your content strategy. It guarantees your creative work is shown in the best possible light and gives it the highest chance of reaching the right people.
And remember, a professional look across all your posts is vital. Planning your content with a tool like OneUp's Instagram grid planner can help you maintain that polished, consistent feel.
Cracking the Code on Instagram's Technical Specs
If you really want to nail your Instagram video formatting, you have to look past the aspect ratio. The real secret sauce is in the technical details—those behind-the-scenes settings that make the difference between a video that looks sharp and one that’s a pixelated mess. When you get these right, you’re working with Instagram's compression, not fighting against it.
Here's the deal: Instagram is going to compress your video no matter what you do. Your job is to hand it a file so perfectly optimized that the compression barely leaves a scratch.
Codecs and Containers: The Building Blocks of Your Video
Let’s get the basics out of the way first. Every video file has two key parts: the container and the codec. Think of the container as the box and the codec as the language used to pack the video data inside.
Fortunately, for Instagram, this choice is a no-brainer.
- Container: Stick with MP4. It’s the universal format that Instagram and pretty much every other platform on the internet prefers.
- Codec: The undisputed champion is H.264 (sometimes called AVC). This codec hits the sweet spot between high-quality video and a file size that doesn't take forever to upload.
When you’re setting up your export, lock these two in first. Picking anything else is just asking for a headache from Instagram’s uploader.
Frame Rate: Finding That Sweet Spot
Frame rate, measured in frames per second (fps), is all about how smooth the motion in your video looks. Your camera might be able to shoot in 60fps or even 120fps for slick slow-motion, but Instagram has its own preferences.
For the vast majority of content, 30fps is your magic number. It’s the standard for digital video, giving you a clean, natural look that plays perfectly on mobile screens.
But what about 60fps? While it can look incredibly fluid for high-action content, it also creates a much larger file. Instagram often has to compress a 60fps video more heavily, which can ironically lead to a worse-looking final product than if you’d just stuck with 30fps.
Pro Tip: My advice? Stick to 30fps unless you have a very specific creative need for a higher frame rate, like a fast-paced sports clip. For 99% of marketing, tutorial, and lifestyle videos, 30fps is the most reliable option.
Bitrate: Your Secret Weapon for Quality
Bitrate is probably the most critical—and most misunderstood—setting of them all. It's the amount of data used to create one second of your video. Higher bitrate equals more data, better quality, and a bigger file. Lower bitrate means less data, a smaller file, and those ugly compression artifacts we all hate.
Here's the trick: Instagram has a cap on the bitrate it will accept. If you upload a video with a sky-high bitrate, the platform will slam it with heavy-duty re-compression, and the results are rarely pretty.
For a standard 1080p video at 30fps, aim for a target bitrate between 10-15 Mbps (megabits per second). This gives Instagram plenty of data to work with for a crisp image, without creating a massive file that its algorithm feels the need to crush into oblivion.
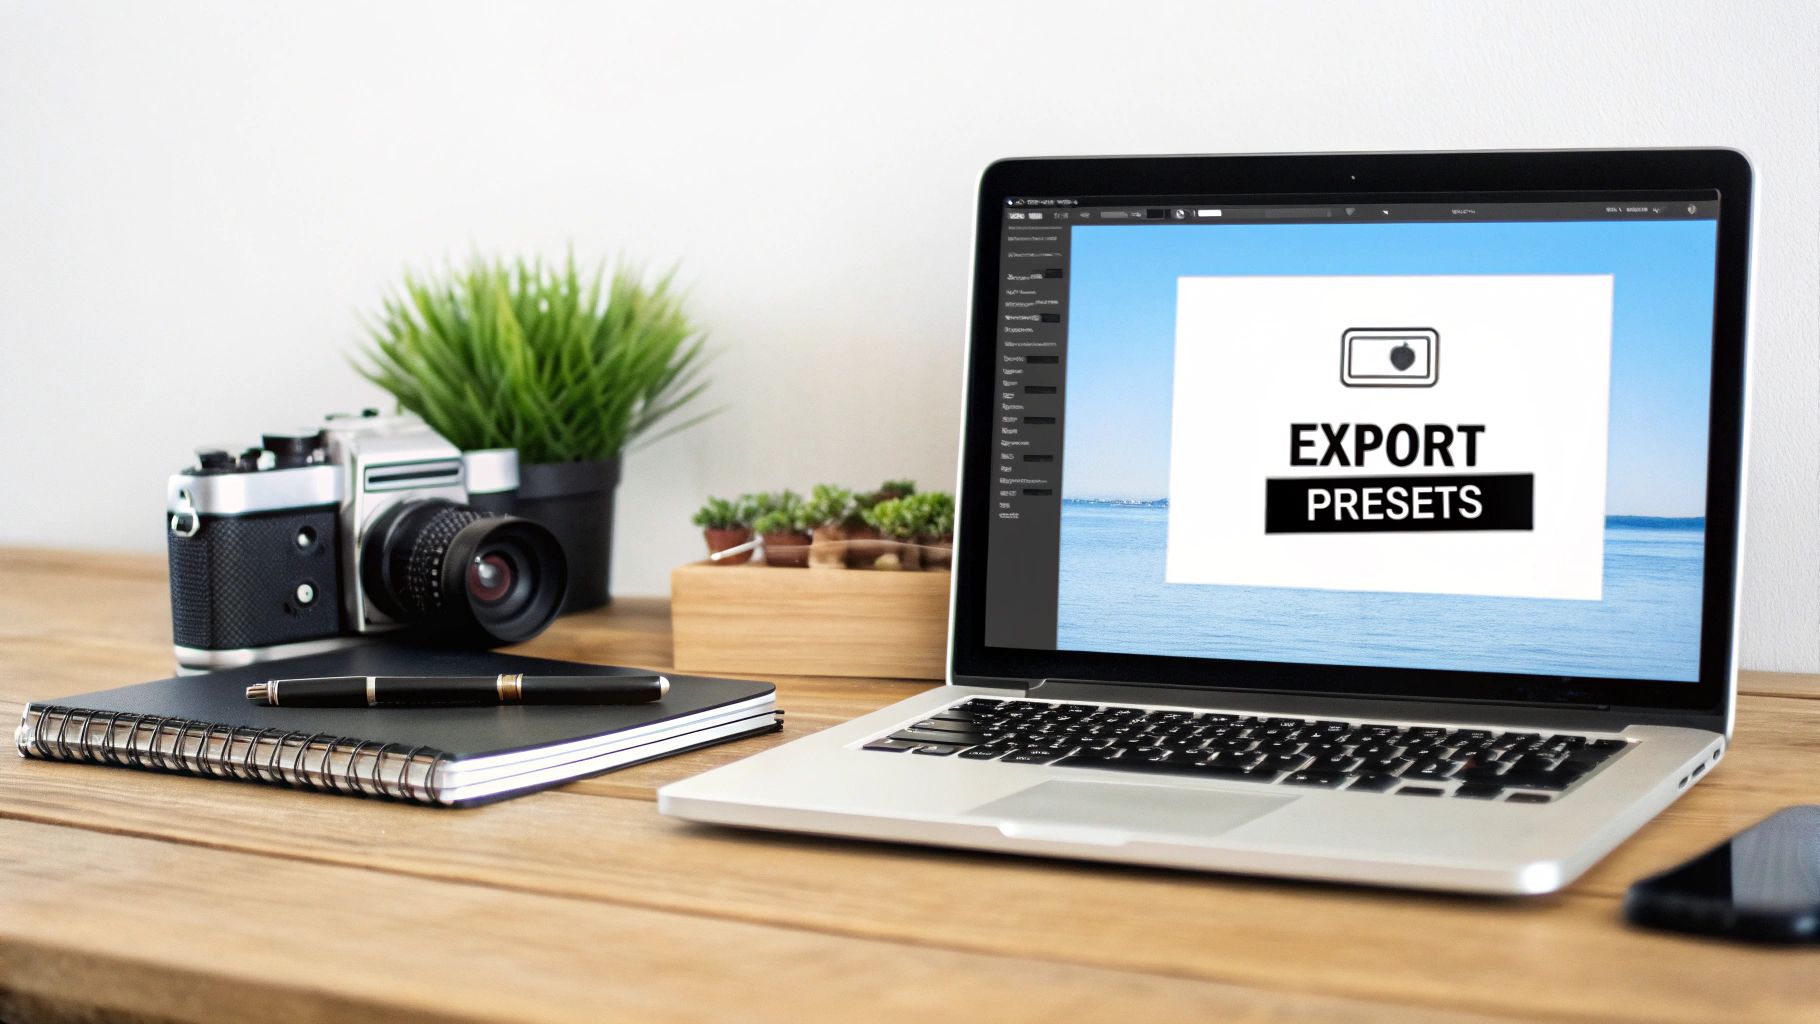
Ready-to-Use Export Presets
Enough theory. Let's get practical. You can build these presets in Adobe Premiere Pro, DaVinci Resolve, or Final Cut Pro to make your life way easier.
Reel & Story Preset (9:16 Vertical)
- Format: H.264
- Resolution: 1080 x 1920
- Frame Rate: 29.97 or 30 fps
- Bitrate Encoding: VBR, 1 Pass
- Target Bitrate: 12 Mbps
- Audio Codec: AAC
- Audio Bitrate: 128 kbps
Feed Post Preset (4:5 Vertical)
- Format: H.264
- Resolution: 1080 x 1350
- Frame Rate: 29.97 or 30 fps
- Bitrate Encoding: VBR, 1 Pass
- Target Bitrate: 10 Mbps
- Audio Codec: AAC
- Audio Bitrate: 128 kbps
Once you’ve saved these, you can export flawless videos with just one click. This kind of consistency not only saves you a ton of time but also guarantees every video you post is dialed in for maximum quality. You're no longer leaving your video's fate up to chance; you're taking control.
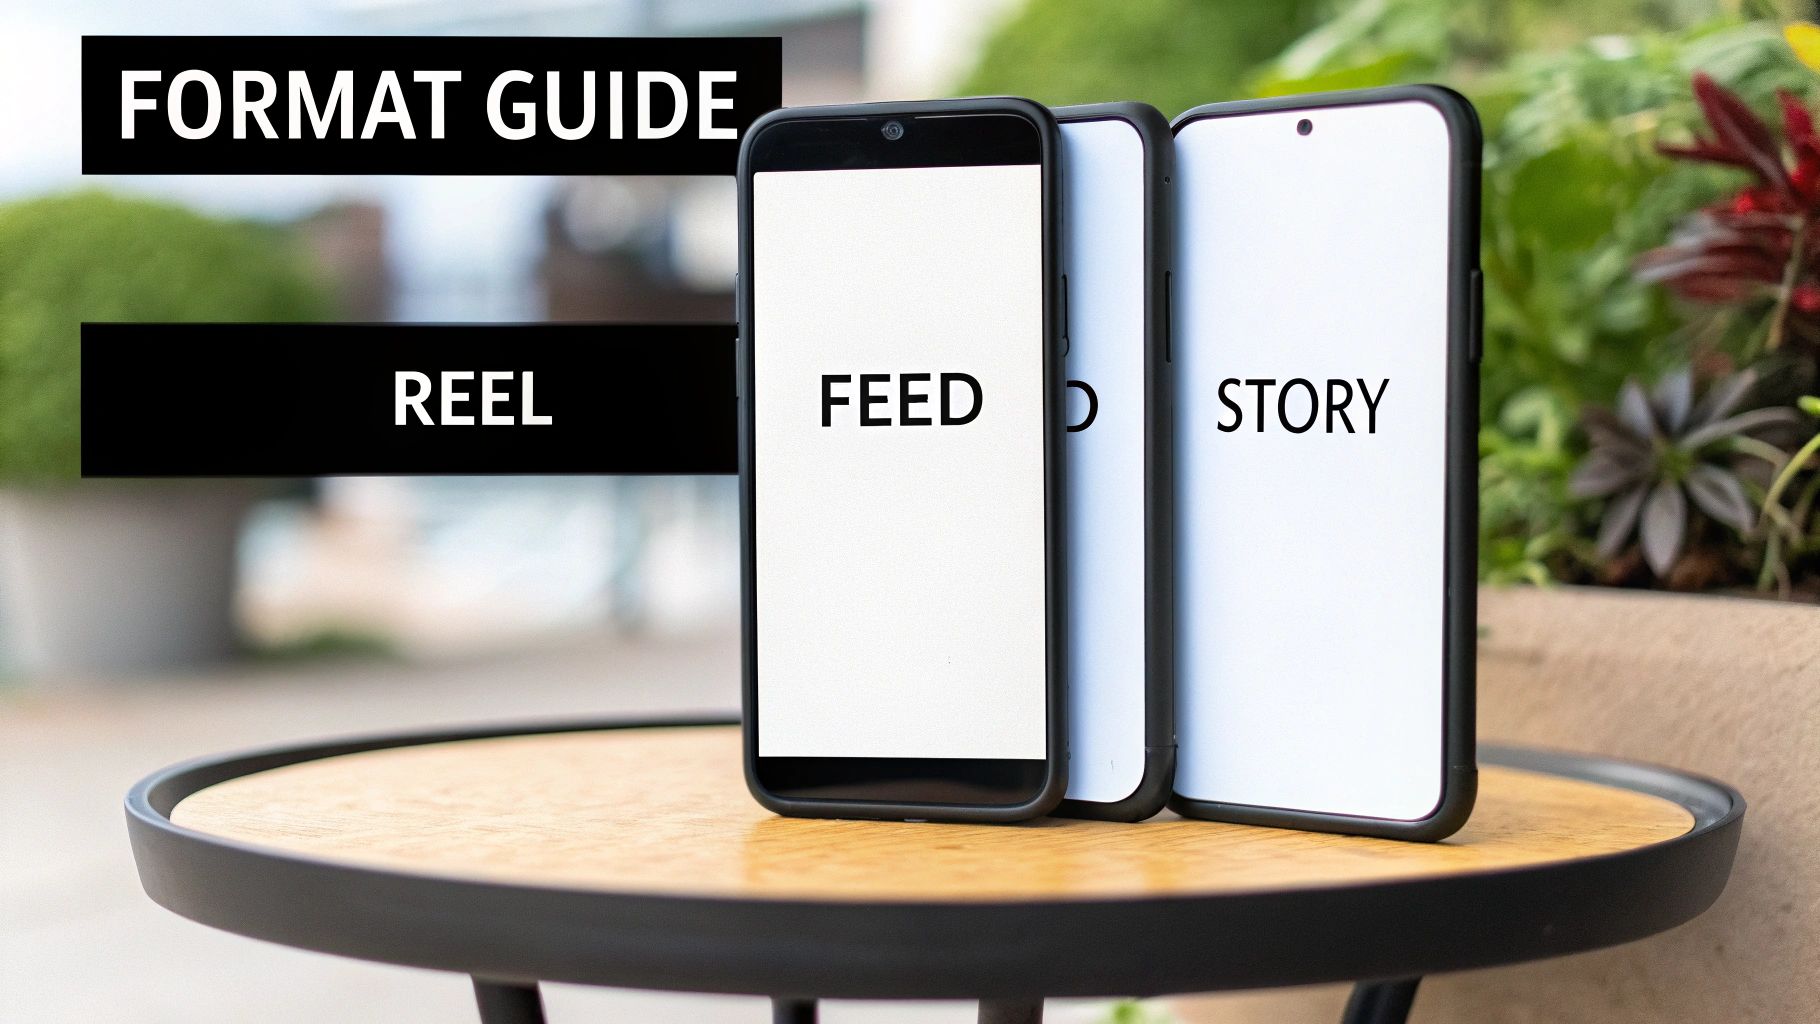
How to Optimize Video for Every Instagram Placement
Getting your export settings right is only half the battle. If you really want your videos to perform on Instagram, you have to think about where they're going to live.
A Reel is not a Story, and a Story is not a Feed post. Each placement has its own vibe and audience expectations. Nail these nuances, and your content will feel native and engaging. Ignore them, and it'll just look like an awkward, repurposed afterthought. This goes way beyond just the aspect ratio—it's about the length, the on-screen text, and how you use interactive features.
Mastering Instagram Reels for Maximum Reach
Think of Reels as your discovery engine. People are scrolling fast, and your one job is to make them stop. And you have to do it instantly.
Those first 3 seconds are everything. You absolutely need a powerful visual hook—a surprising movement, a bold piece of text, an intriguing question. Without it, viewers will swipe on by before you even get to your point.
While everyone preaches "short and snappy," the data tells a slightly different story. It's true that clips under 60 seconds drove the initial virality of Reels, but we're now seeing that videos in the 60–90 second range often pull in the highest average views and engagement. This works especially well for tutorials or any storytelling that needs a bit more room to breathe. The trick is to lead with that killer 3-10 second hook, then deliver the goods.
When you're making a Reel, "thumb-stopping power" should be your mantra. If that first frame doesn't make someone pause their scroll, you're starting at a disadvantage. Your goal is content that feels both entertaining and valuable right from the jump.
Respecting the Safe Zones
A classic mistake, especially with Reels and Stories, is forgetting about the "safe zones." These are the parts of the screen that will eventually get covered by Instagram’s own interface—the username, caption, like buttons, and so on.
Here’s a quick guide to keep your visuals clean:
- Top: Leave about 15% of the screen height clear.
- Bottom: Keep a good 20-25% of the screen height clear for captions and engagement icons.
- Right Side: Remember the like, comment, and share buttons live here, so leave a small margin.
Placing your important text, logos, or subtitles outside these areas means your message won't get awkwardly blocked by the app's UI.
Crafting Immersive Feed Videos
While Reels are for finding new people, your Feed videos are mostly for your existing audience. For these, the 4:5 aspect ratio (1080×1350 pixels) is your absolute best friend. It fills up way more of the screen than a square or landscape video, making it feel more immersive without demanding the full vertical commitment of a Reel.
The key is to make that 4:5 crop look intentional. If you're repurposing a wider 16:9 video, don't just crop to the center and call it a day. Take a moment to reframe your shots in post-production. Make sure your main subject is perfectly composed within that vertical space for a clean, professional look. For more ideas on creating eye-catching video content, check out these strategies for creating captivating video tours.
Leveraging Stories for Engagement
Instagram Stories are all about what's happening right now. They share the same 9:16 aspect ratio as Reels, but their purpose couldn't be more different. Stories aren't for polished, perfect content; they're for raw, in-the-moment connection with your most loyal followers.
The biggest fumble I see is brands just reposting their Reels to their Stories with no changes. To really make Stories work for you, you have to use Instagram's native interactive features.
- Polls and Quizzes: Ask your audience questions and get instant feedback.
- Question Stickers: Let followers ask you anything. It’s a direct line of communication.
- Link Stickers: Drive traffic right where you want it to go—your site, a product page, a new blog post.
Using these tools turns a passive viewing into an active conversation. It doesn't just bump up the engagement on that Story; it helps build a stronger community around your brand. Each placement has its own job to do, and treating them with this kind of specific attention is what will set your content apart.
Nailing Your Thumbnails, Captions, and Audio
Getting your video export settings right is a huge win, but don't stop there. A technically perfect video can still fall flat if it doesn't grab attention immediately. The final, critical polish comes down to three things: your thumbnail, your captions, and your audio.
Think of it like this: your export settings are the engine, but these three elements are the shiny paint job, the custom wheels, and the killer sound system that make people actually want to get in and take a ride.
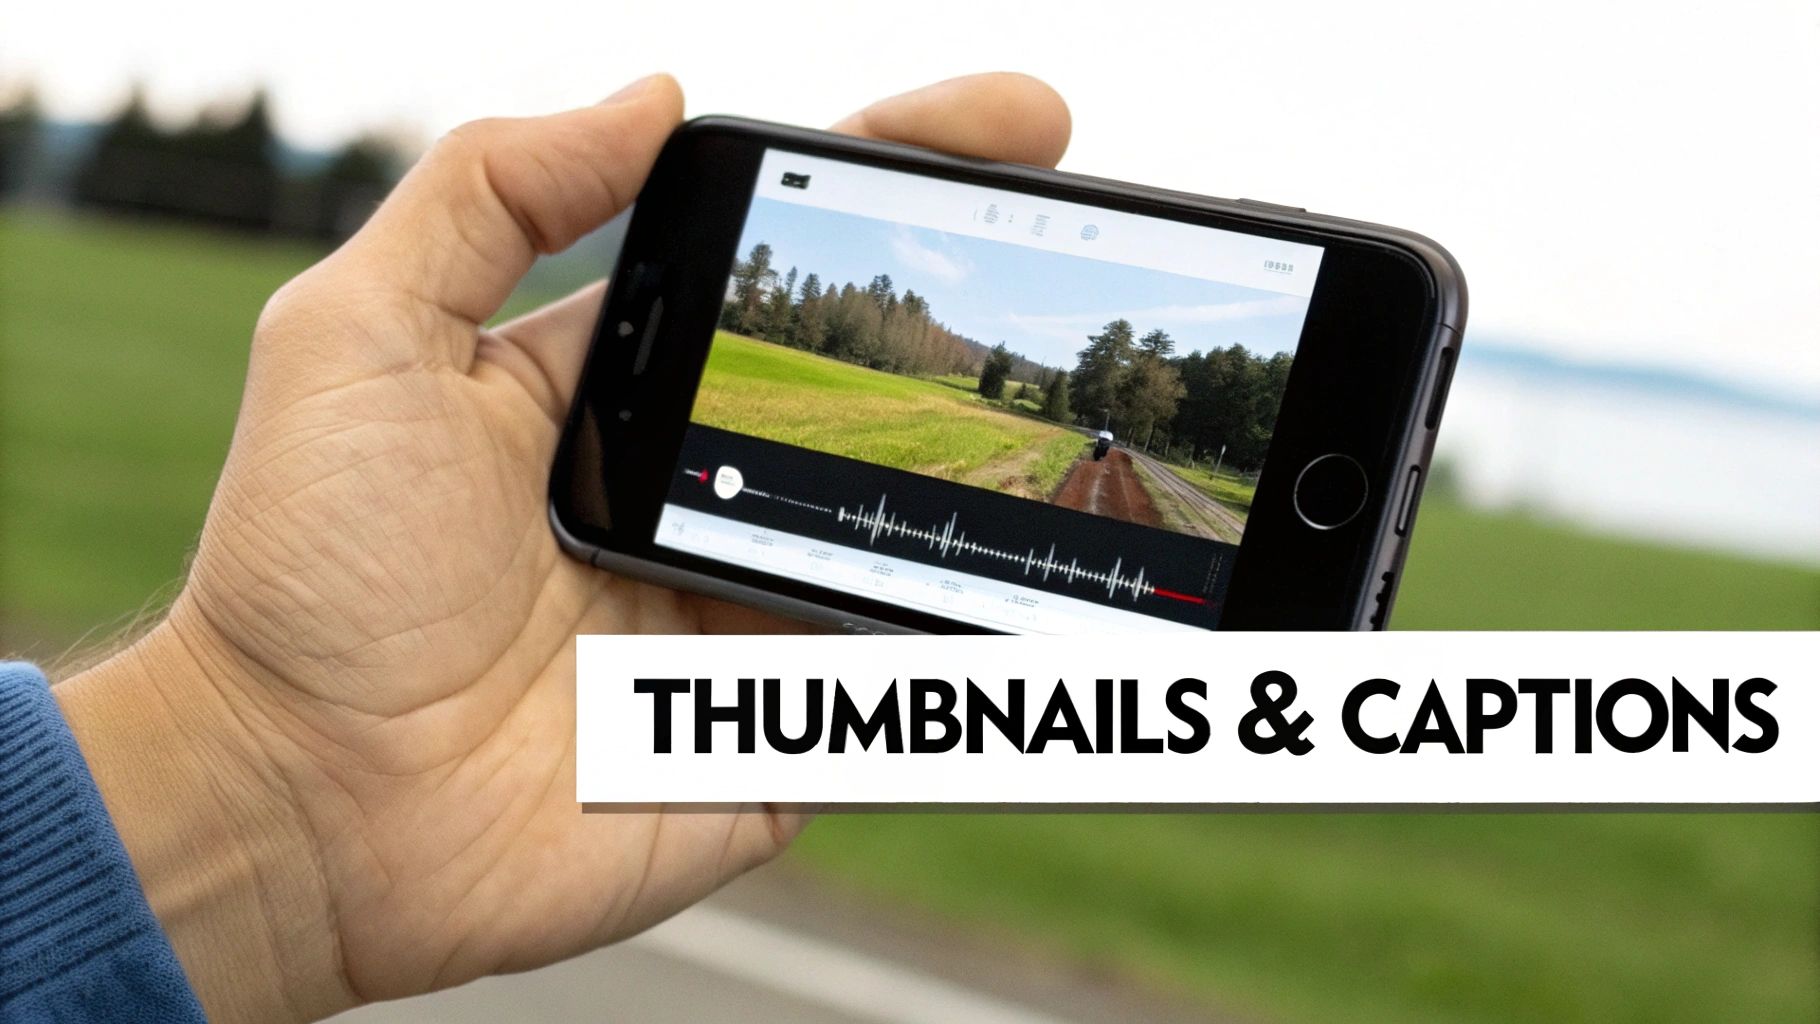
Get these right, and you’ll turn a good video into an unskippable one.
Designing a Thumbnail That Stops the Scroll
Let's be real: your thumbnail is your video's first impression, and you only get one. It’s what people see on your profile grid and what competes for eyeballs on the Explore page. A weak thumbnail gets scrolled past. A great one gets the tap.
Relying on Instagram to pick a random frame for you is a rookie mistake; it's almost never the most compelling shot. You absolutely have to create a custom thumbnail.
Here’s what works:
- High-Contrast & Bright: Your thumbnail needs to pop against the app's busy interface.
- Clear Title: Use bold, readable text that screams value. Think "5-Minute Pasta Hack," not just a picture of noodles.
- On-Brand: Keep your colors and fonts consistent to build brand recognition.
- Intriguing: A great facial expression, a striking visual, or a question can spark curiosity and earn the click.
You can whip these up in a tool like Canva and upload them when you publish. If you’re streamlining your workflow, many schedulers, including OneUp, integrate directly with Canva. This lets you design your cover image and attach it right as you're scheduling your post—a huge time-saver.
Why Burned-In Captions Are Non-Negotiable
A huge number of people watch videos on their phone with the sound off. It's just a fact of life. If your video has someone talking, you’re losing a massive part of your audience if you don't have captions.
Instagram’s auto-captions are okay in a pinch, but burned-in captions (or "open captions") are way better. These are text overlays that are baked right into the video file itself. This gives you total control over the font, color, and placement to make sure they’re always legible and match your brand’s vibe.
Don't treat captions as an afterthought. Weave them into the creative style of your video. You can use animated text, highlight key words with color, or use pop-ups to make your video more dynamic and easy to follow, even on mute.
When you're writing them, keep it short and sweet. Aim for just one or two lines on the screen at a time. It’s a small detail that makes a huge difference in watch time and accessibility. And if you’re stuck on what to write for the main post description, an AI-powered Instagram caption generator can be a great way to get the ideas flowing.
Perfecting Your Audio Mix
Even in a sound-off world, your audio has to be on point for the people who do turn the volume up. Nothing makes a viewer exit faster than crackly, muffled, or unbalanced sound. Your goal should be a clean mix that sounds great even coming out of tiny phone speakers.
First, vocal clarity is king. If there's a voiceover or someone talking, it needs to be the loudest element in the mix. A classic mistake is letting the background music drown out the speaker. It's frustrating for the listener and they will just leave.
Second, pay attention to trending audio on Reels. Using a popular song can absolutely give you a boost from the algorithm. But don't just slap a trending sound on a video where it feels out of place. It needs to fit your brand and the message. To keep things organized, OneUp lets you add notes to scheduled posts, so you can remind yourself which trending audio you plan to add in the Instagram app right before publishing.
Finally, watch your levels to avoid distortion. When you export your video, a good rule of thumb is to have your master audio track peak somewhere between -3dB and -6dB. This leaves enough headroom to prevent that awful clipping sound and makes sure your audio is crisp and professional.
Streamline Your Workflow with OneUp for Perfect Video Publishing
You’ve spent hours editing, color grading, and getting your video just right. The last thing you want is for all that hard work to get ruined by a clunky upload process. I’ve been there—trying to AirDrop a huge master file or use a cloud service to get a video from my computer to my phone, only to have it come out looking compressed and pixelated. It's incredibly frustrating.
This is exactly why a dedicated scheduling tool is a non-negotiable part of my workflow for formatting video for Instagram.
Using a platform like OneUp completely changes the game. It creates a direct pipeline from your editing software to Instagram. You upload your perfectly formatted MP4 file straight from your desktop, which means the high-bitrate version you exported is the one that actually goes live. This one change eliminates the most common and annoying reason for quality loss.
Avoid Quality Loss and Save Precious Time
The biggest win here is preserving your video’s integrity. When you upload directly from your desktop to a scheduler, you skip the mobile transfer step entirely. No more surprise compression artifacts from messaging apps or cloud drives messing up your masterpiece.
It’s also a massive time-saver. Instead of juggling files and sending them back and forth between devices, you can sit down at your main workstation and schedule out a week’s worth of content in one go. For social media managers and agencies handling multiple client accounts, this isn't just a convenience—it's essential for staying sane and efficient.
Game-Changing Features for Video Creators
Today’s scheduling tools are so much more than just a "set it and forget it" publishing button. They're packed with features designed to make your life easier and your content better. A comprehensive platform like OneUp, for example, gives you a whole suite of tools built specifically for Instagram video.
Here are a few features I find myself using all the time:
- Schedule Reels with Custom Cover Images: Don't let Instagram pick a random, blurry frame for your thumbnail. You can design a slick cover image and upload it directly with your Reel. This keeps your profile grid looking sharp and on-brand.
- Automatic First Comment: This is a classic trick for a reason. OneUp lets you schedule your hashtags to post automatically in the first comment. It keeps your main caption clean and readable while still getting all the discoverability benefits from your tags.
- Direct Canva Integration: Need a quick graphic for a thumbnail or a Story? OneUp’s built-in Canva button is a lifesaver. You can design what you need right inside the scheduler without having to open another tab. It’s a seamless way to create and plan at the same time.
Having a visual content calendar in OneUp makes it easy to see what’s coming up, helping you plan a cohesive strategy and ensure your videos are spaced out effectively.
Build a Reliable and Repeatable System
Growing on Instagram is all about consistency. When you have a solid system, it removes the friction and makes it way easier to post high-quality content on a regular schedule. It's about building a content engine, not just a posting calendar.
OneUp is great for this long-term approach. The ability to set posts to repeat is a huge one. Got a killer tutorial or a brand introduction video that always performs well? Set it to republish every few months to reach new followers and maximize its value without any extra effort.
A great workflow isn’t just about posting; it’s about creating a sustainable process. By automating the tedious parts of publishing, you free up more time to focus on what really matters—creating amazing video content that connects with your audience.
If you're managing multiple accounts, things get even easier. You can group social accounts into categories and schedule the same video across different client profiles with a single click. For teams, you can even set up post-approval workflows so that a second pair of eyes can review every video before it's published. And if you want to elevate your production process even further, you might consider outsourcing video editing services to get that polished, professional look every time.
Ultimately, integrating a tool like OneUp turns the tedious task of publishing Instagram videos into a streamlined, strategic part of your operation. You can learn more about how OneUp helps creators and businesses take control of their social media.
Common Instagram Video Formatting Questions Answered
Even when you’ve memorized all the ideal settings, you can still run into some frustrating roadblocks when formatting video for Instagram. Let's walk through some of the most common questions that pop up, starting with the technical stuff and then getting into strategy.
Why Does My Video Still Look Bad After Exporting Correctly?
This is easily the biggest headache for video creators. You did everything right—nailed the bitrate, used the H.264 codec, set the resolution to 1080p—but your video still looks soft or pixelated after you upload it.
Nine times out of ten, the culprit is how the video file gets from your computer to Instagram's servers.
Sending a finished video to your phone through a messaging app like iMessage or WhatsApp will absolutely murder its quality. Those apps apply their own heavy compression to save data. Using a service like AirDrop is a step up, but the most bulletproof method is to upload the master file directly from your desktop with a scheduling tool.
A platform like OneUp sidesteps this problem completely. It creates a direct pipeline for your pristine, high-quality file to Instagram, bypassing the quality-killing mobile transfer step. This makes sure the video you spent all that time exporting is the one your audience actually sees.
The journey your video file takes to the Instagram servers matters just as much as your export settings. Every extra transfer, especially through mobile apps, introduces another round of compression that degrades your hard work.
Reel vs. Feed Post: Which Should I Choose?
Strategically, the choice between posting a video as a Reel or a regular Feed post really boils down to one simple question: What's your goal?
- Go with Reels for discovery and reach. The Reels algorithm is built to push your content out to people who don't follow you yet. If you’re trying to grow your audience and get in front of new faces, Reels are absolutely the way to go.
- Use Feed posts for nurturing your existing community. Feed videos are shown primarily to your current followers. This is the place for deeper storytelling, important updates, or any content that provides direct value to the people who already know and like your brand.
How Can I Repurpose One Horizontal Video For All Placements?
This is a huge time-saver. Turning a single 16:9 horizontal video into content for every Instagram format just requires a little bit of planning during your shoot. The key is to "shoot for the crop." This means keeping your main subject and all the important action near the center of the frame, leaving plenty of empty space on the sides, top, and bottom.
Back in your editing software, you can then create three different sequences from that one master clip:
- Reel/Story (9:16): Create a vertical sequence and reframe each shot to keep the action centered.
- Feed Post (4:5): Make a slightly less aggressive vertical crop. This gives you a bit more horizontal room to work with.
- Feed Post (1:1): A simple center crop is usually all you need for the classic square format.
This method is way more efficient than trying to film three separate versions. To make things even faster, a tool like OneUp lets you bulk upload posts from a CSV, which is perfect for publishing all these repurposed clips at once.
Ready to stop fighting with Instagram's compression and start publishing perfect videos every time? OneUp gives you the tools to schedule high-quality Reels, Stories, and posts directly from your desktop, preserving quality and saving you hours. See how OneUp can streamline your entire social media workflow.