Facebook Groups are a great way to grow a community and find like-minded people. This post goes over how to create a Facebook Group.
How to create a Facebook Group
Go the Groups page in Facebook
Click “Create Group”
Name your Group
Add some people to your Group
Select Privacy
Choose whether Group is hidden or not
Click Create Group
Choose cover photo
Add a description
Edit Group settings
Add members
Create community and encourage engagement
Here is those steps with screenshots:
1. Go the Groups page in Facebook
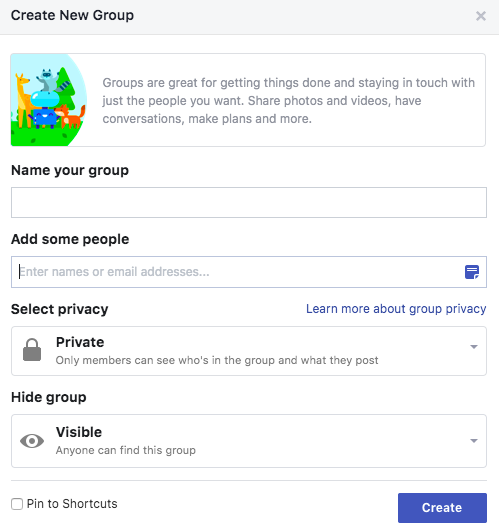
2. Click “Create Group”
3. Name your Group
Make sure to name your Group something descriptive so people can find it via search.
4. Add some people to your Group
You can skip this step if you do not want to add people right now.
5. Select Privacy
You can choose for your Group to be either Public or Private.
For Public Groups, anyone can see who’s in the Group and what they post. For Private Groups, only member can see who’s in the Group and what they post.
Private Groups tend to have better community and engagement, as there are many people on Facebook that do not want their friends and family to see their comments made in a Public Group.
6. Choose whether Group is hidden or not
Visible Groups means anyone can find the Group.
Hidden Groups means only members can find the Group, and people can only join via invitation.
If you want to grow a large Facebook Group, it is recommended to choose Visible.
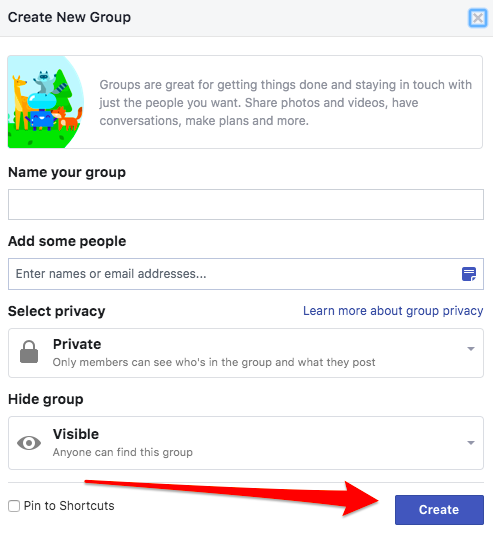
7. Click Create Group
8. Choose cover photo
You can upload a photo, or choose a template illustration.
9. Add a description
Add more information about your Group here. Who is your Group for? What is the purpose of your Group? If you have any Group rules, you can add it here as well.
10. Edit Group settings
Once in the Group settings, you will have the option to customize many settings to your liking.
Items you can change:
Group Name
Group Type
Description
Location – This can help people find your group more easily if they’re looking for groups in your area.
Tags – Tags help people find groups they might be interested in joining. You can change these at any time.
Apps – Tools and features offered by other businesses.
Linked Pages – Give your business, brand or organization a voice on Facebook and connect with the right people.
Color
Web Address – Customize your group’s contact info so you can quickly share a link to your group.
Privacy Settings
Hide Group
Badges – Enable members to earn badges to encourage participation.
Post Topics – Organize posts by adding relevant topics to them
Membership Preapprovals — Do you want to let anyone add members or should only you be able to?
Membership Requests – Learn more about people who want to join your group by asking them some questions. You can ask up to 3 questions, and only the admins and moderators will see the answers.
Membership Requests from Pages
Posting Permissions — Here you can decide if only admins can post or if members can as well
Post Approval — You can require that all posts be approved by an admin before going live
Keyword Alerts – Keyword alerts tell you when members use certain words or phrases in your group.
Once you’re done, click “Save”.
11. Add members
Now your Group needs some members. Add some friends you think might be interested in joining your Group.
12. Create community and encourage engagement
All good Facebook Groups require an Admin that adds value to the Group and starts good discussions. Stay active in the Group and post frequently as the Group is growing.
Facebook likes to promote active Groups, so if you want more people to find your Group, create a new post at least a few times a week.
Best of luck to you as you create your Facebook Group!
Want to add your Facebook Page as an Admin of your Facebook Group?
Reddit is full of subreddits. Some subreddits are great, some subreddits are terrible. Here is a list to help you find the top 17 best subreddits on Reddit.
In no particular order, here are some of the top subreddits on Reddit:
The most watched YouTube video of all time is Despacito by Luis Fonsi featuring Daddy Yankee. The video has over 6.8 Billion views on YouTube.
Despacito’s became the most watched YouTube video ever in 2017, showing that YouTube and the music video industry are more popular than they have ever been. For a long period of time, nobody thought Gangnam Style would ever be overtaken.
It also shows how YouTube has become a phenomenon globally. Despacito, which means “Slowly” in Spanish, is sung by Puerto Rican singer Luis Fonsi in Spanish, and also features Puerto Rican rapper Daddy Yankee.
Despacito topped the charts of 47 countries and entered the Top 10 in ten others. It was the first song to top the Billboard 100 in Spanish in 20 years.
A few months later, Justin Bieber came out with a remixed version of Despacito, where he sang some lines in English. This most likely helped the original version’s popularity, but it didn’t overtake it or enter the YouTube Most Viewed charts.
Despacito became the first YouTube video to ever hit three billion views. It overtook See You Again by Wiz Khalifa featuring Charlie Puth to become YouTube’s most watched video ever in August of 2017.
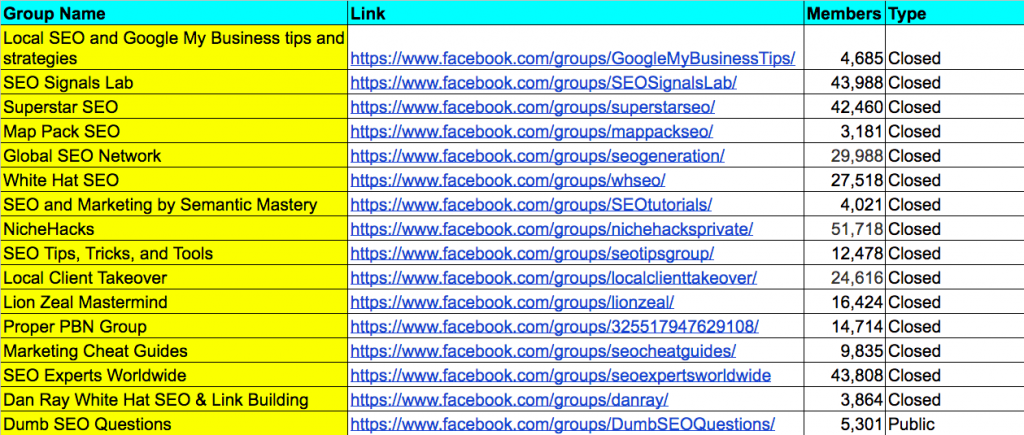
Here is a spreadsheet of the 28 best SEO-related Facebook groups that every SEO should join.
If you are interested in discussing local SEO and Google My Business tips and strategies (as opposed to SEO as a whole), join us on Local SEO Community:
Here are some of the included SEO Facebook groups:
Local SEO and Google My Business tips and strategies Superstar SEO Map Pack SEO Global SEO Network SEO Signals Lab White Hat SEO SEO and Marketing by Semantic Mastery NicheHacks SEO Tips, Tricks, and Tools Local Client Takeover Lion Zeal Mastermind Proper PBN Group Marketing Cheat Guides SEO Experts Worldwide Dan Ray White Hat SEO & Link Building Dumb SEO Questions Video Marketing Group WordPress, SEO, & Internet Questions SEO Masters Academy SEO Hackers Local SEO Ballers Google My Business Help Group SEO and Blogger lounge Agency Jungle Local SEO Onpage rocks – Technical SEO Made Easy Onpage Academy Niche Affiliate Empires
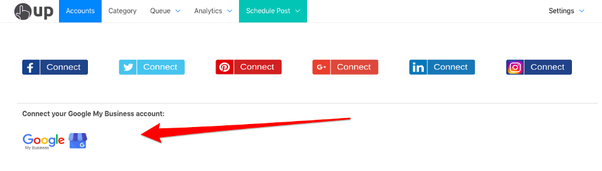
Need an easy way to schedule and automatically repeat Google My Business posts?
The fact that your Google My Business posts expire after 7 days means that you have to constantly go back into GMB and post something week after week, again and again.
The solution: schedule out your Google My Business posts weeks or even months ahead of time.
The process is simple. Just connect your Google My Business account on the Accounts page.
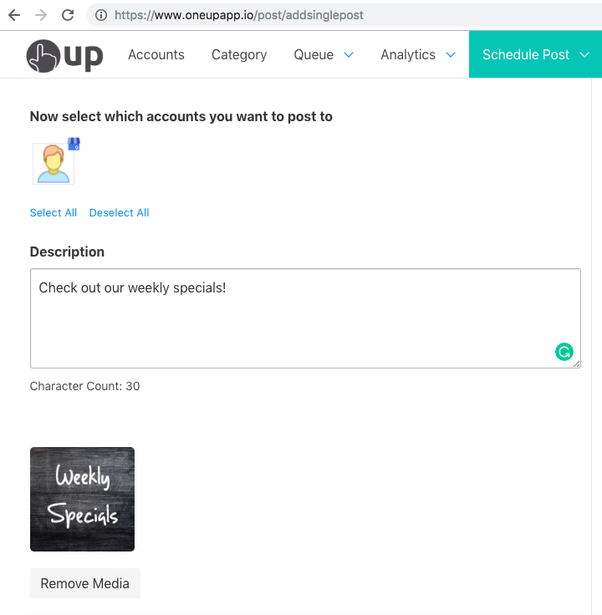
Then schedule your GMB post, optionally adding any link or image to the post.
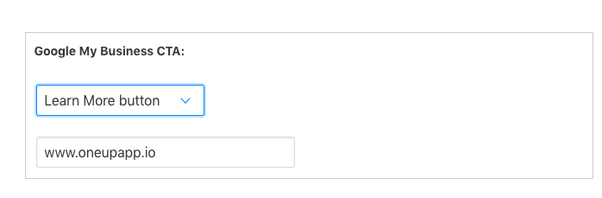
Then add your Call-To-Action button and a link.
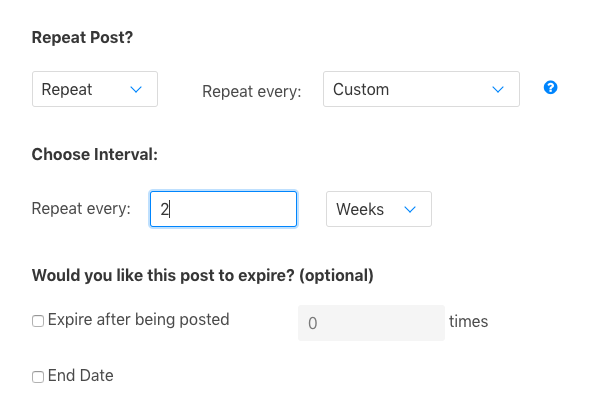
In addition to just scheduling posts, OneUp allows you to set GMB posts to automatically repeat at custom intervals — such as once a week or once a month.
This allows you to reap the benefits of being active on Google My Business, without the hassle of constantly going back in every week to manually post something once your post expires.
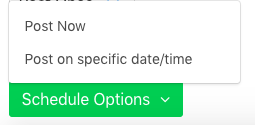
Then choose to post it now, or schedule it for a date in the future.
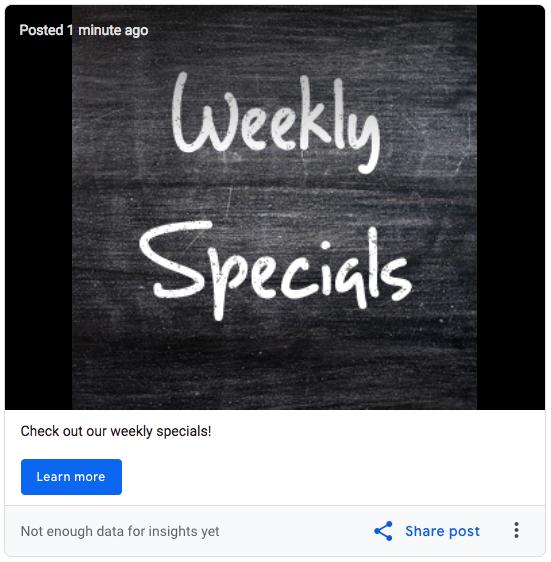
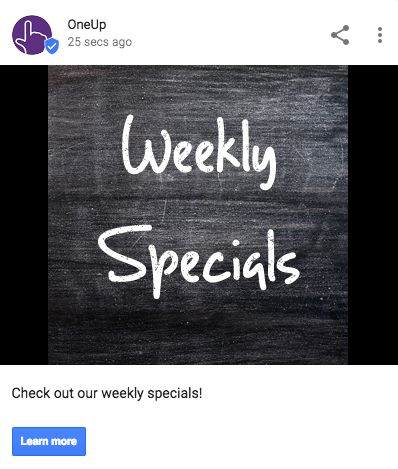
Here is what the post looks like inside your Google My Business account:
And here is what the post looks like on the Google search results page:
If you’re looking for a way to schedule and post to Bluesky and all your other social media accounts at the same time, check out OneUp.
OneUp supports scheduling both regular Bluesky posts, as well as multi-post threads on Bluesky.
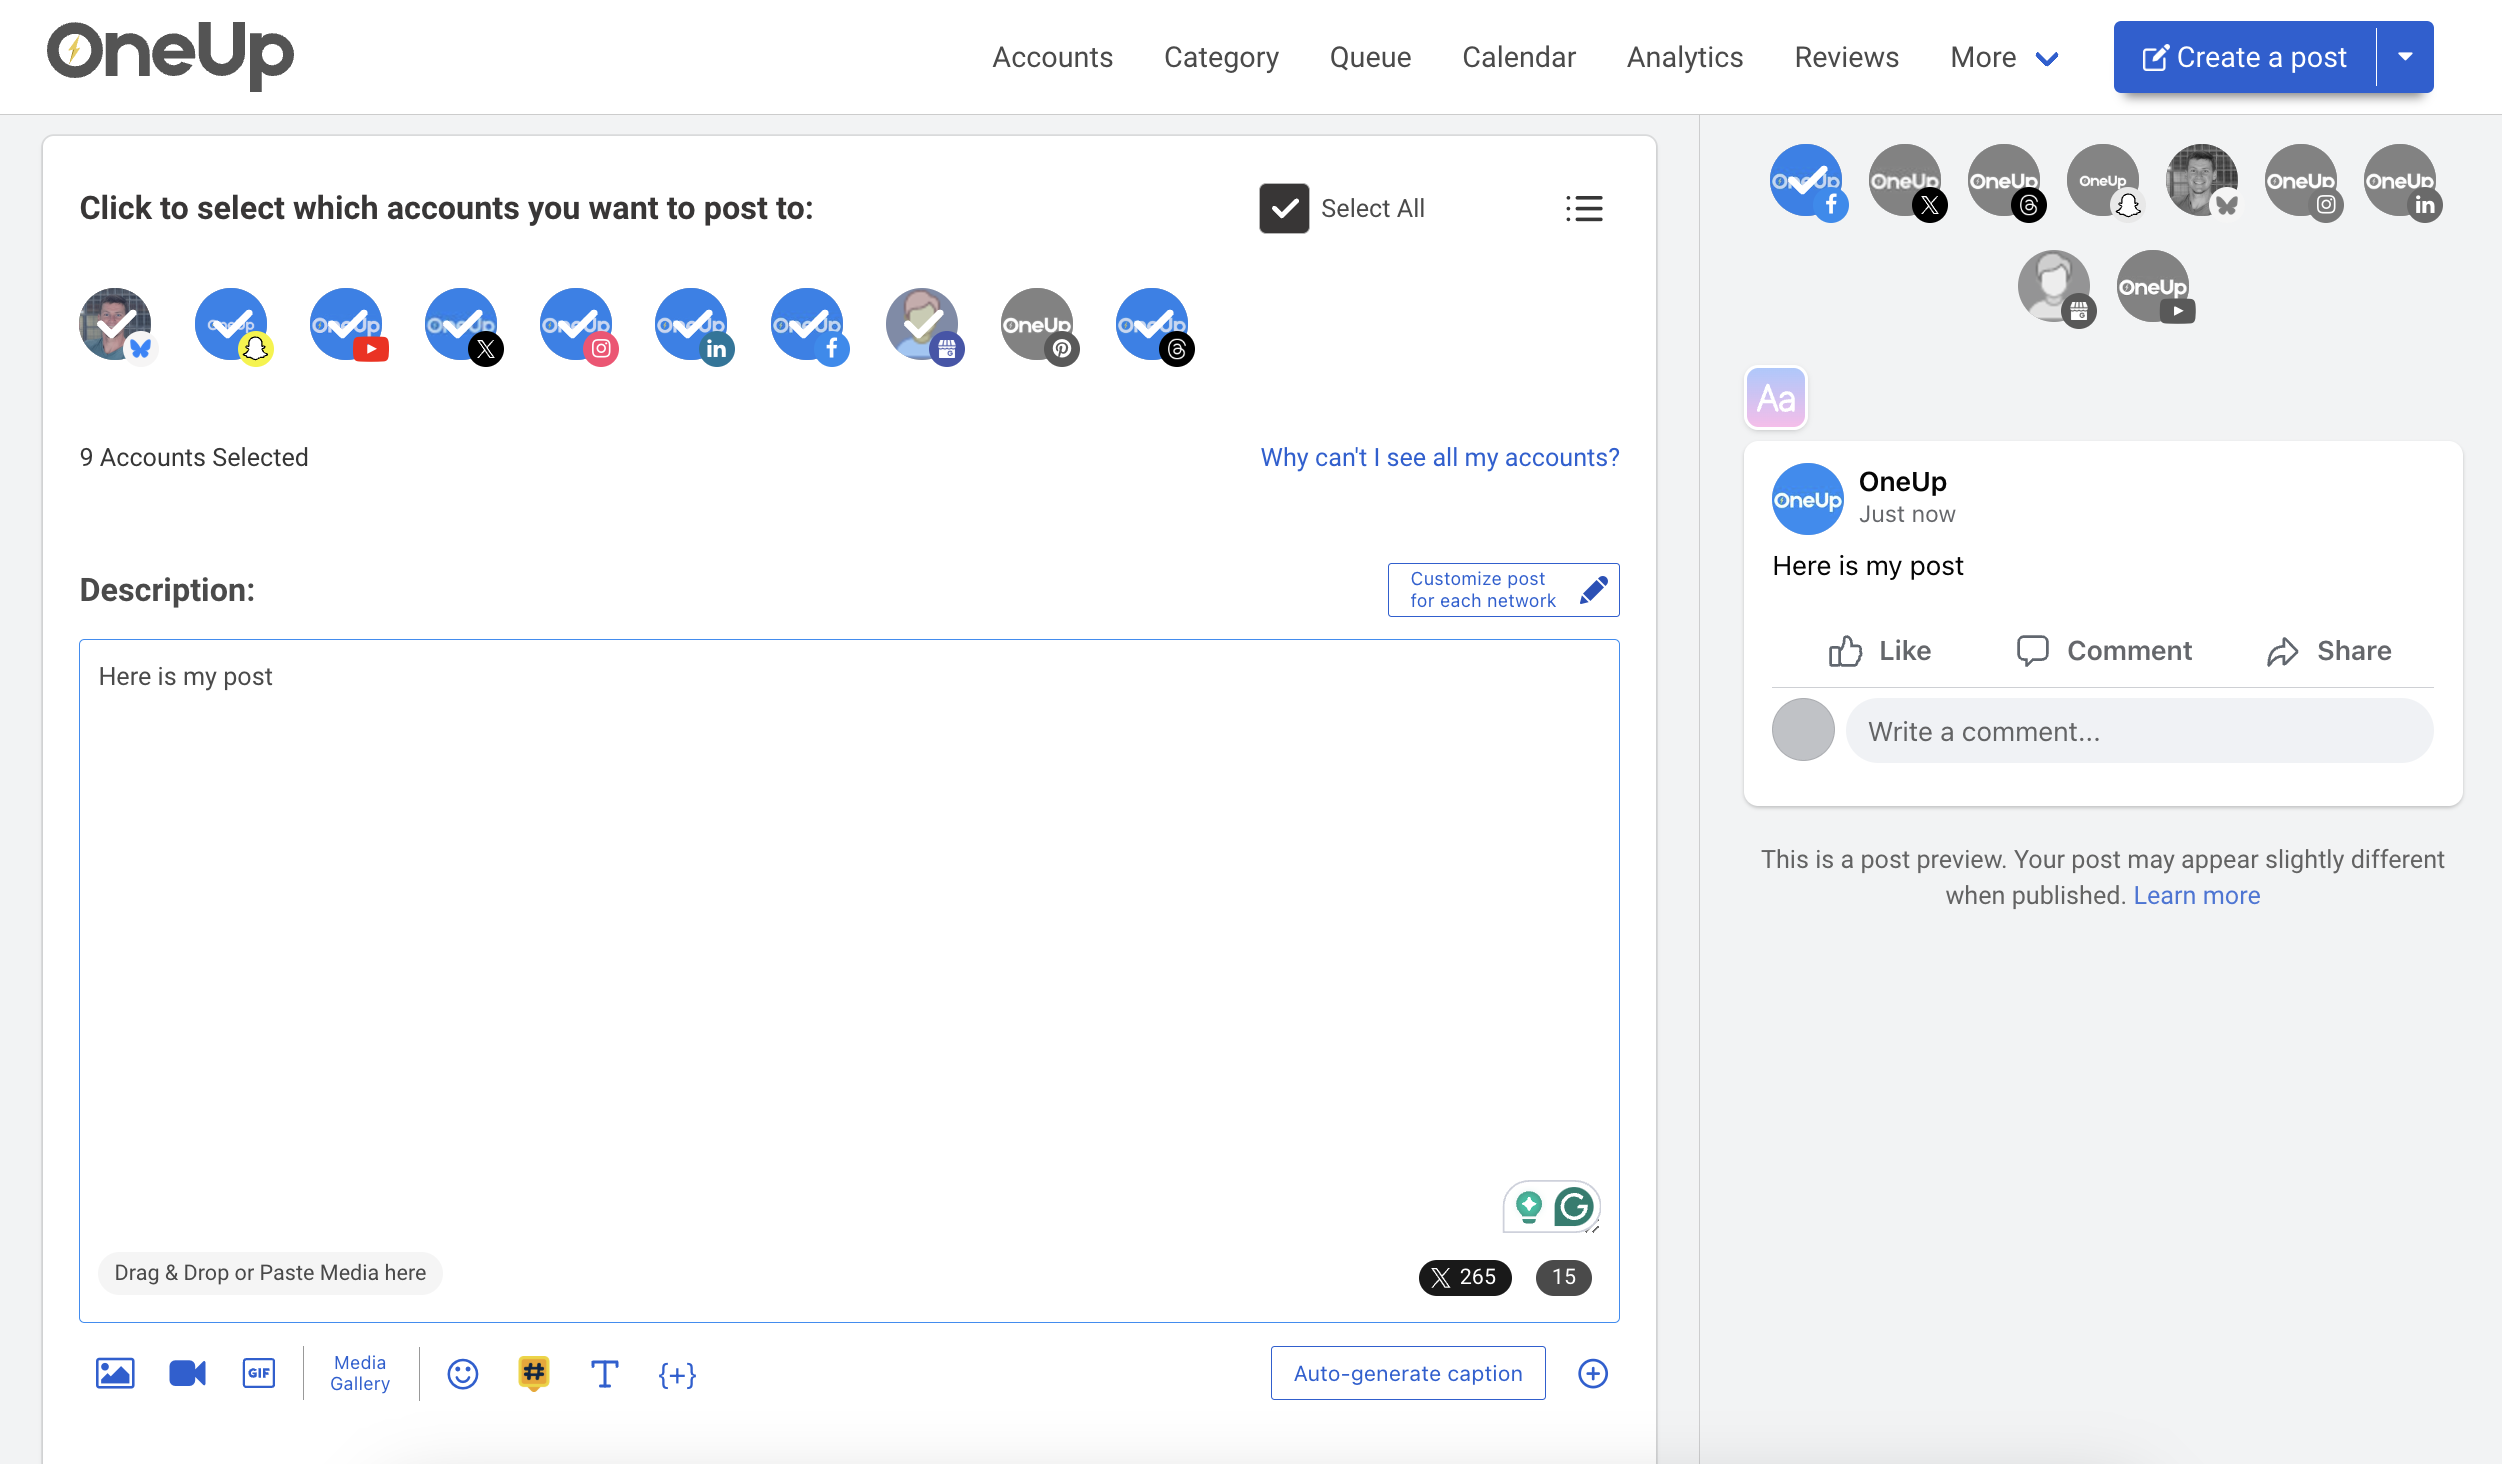
OneUp is a social media scheduling tool that supports Bluesky, Facebook, Instagram, LinkedIn, X, Threads, Pinterest, TikTok, YouTube, Snapchat, and Google Business Profiles.
So that means you can create your post, then publish it to ALL your social media accounts at once.
You can also schedule posts weeks, months, or even years in advance with OneUp.
And yes, video posts to Bluesky ARE supported in OneUp!
Try out OneUp if you’re looking for a Bluesky cross-posting and scheduling tool.
OneUp is one of the only Bluesky thread schedulers.
You’re probably in search of a social media scheduling tool that supports posting to Instagram accounts – but for Instagram accounts that are NOT linked to a Facebook Page.
Well you’re in the right spot.
OneUp is a social media scheduler that supports posting to Instagram accounts that are NOT linked to a Facebook Page.
You’ll see these 2 options when connecting your Instagram account to OneUp
The only requirement is that the Instagram account is either a Business or Creator account (personal Instagram accounts won’t work).
But you do NOT need to have a Facebook Page.
OneUp supports posts, carousels, Reels, collabs, first comments, and a ton more.
In addition to Instagram, OneUp also supports many other social networks.
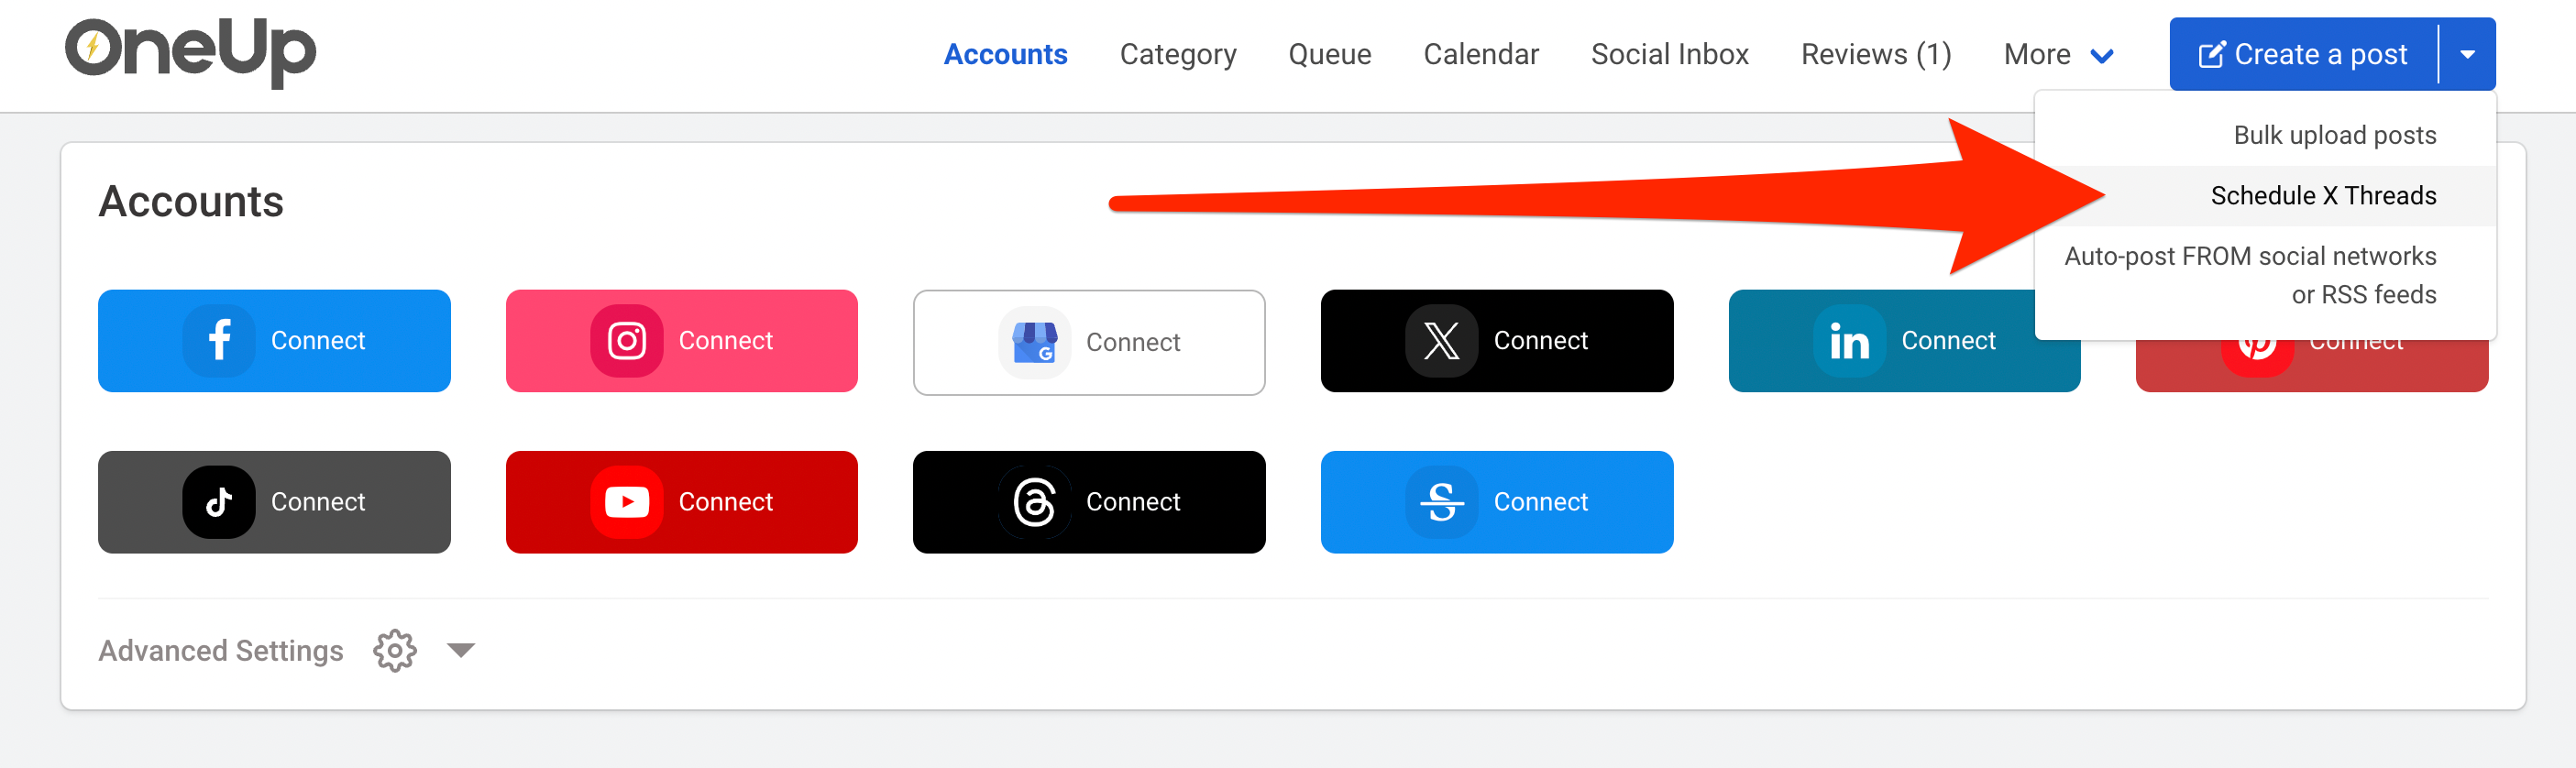
To create your X thread in OneUp, click “Schedule Twitter Threads” in the Schedule Post dropdown.
Then start creating your X thread:
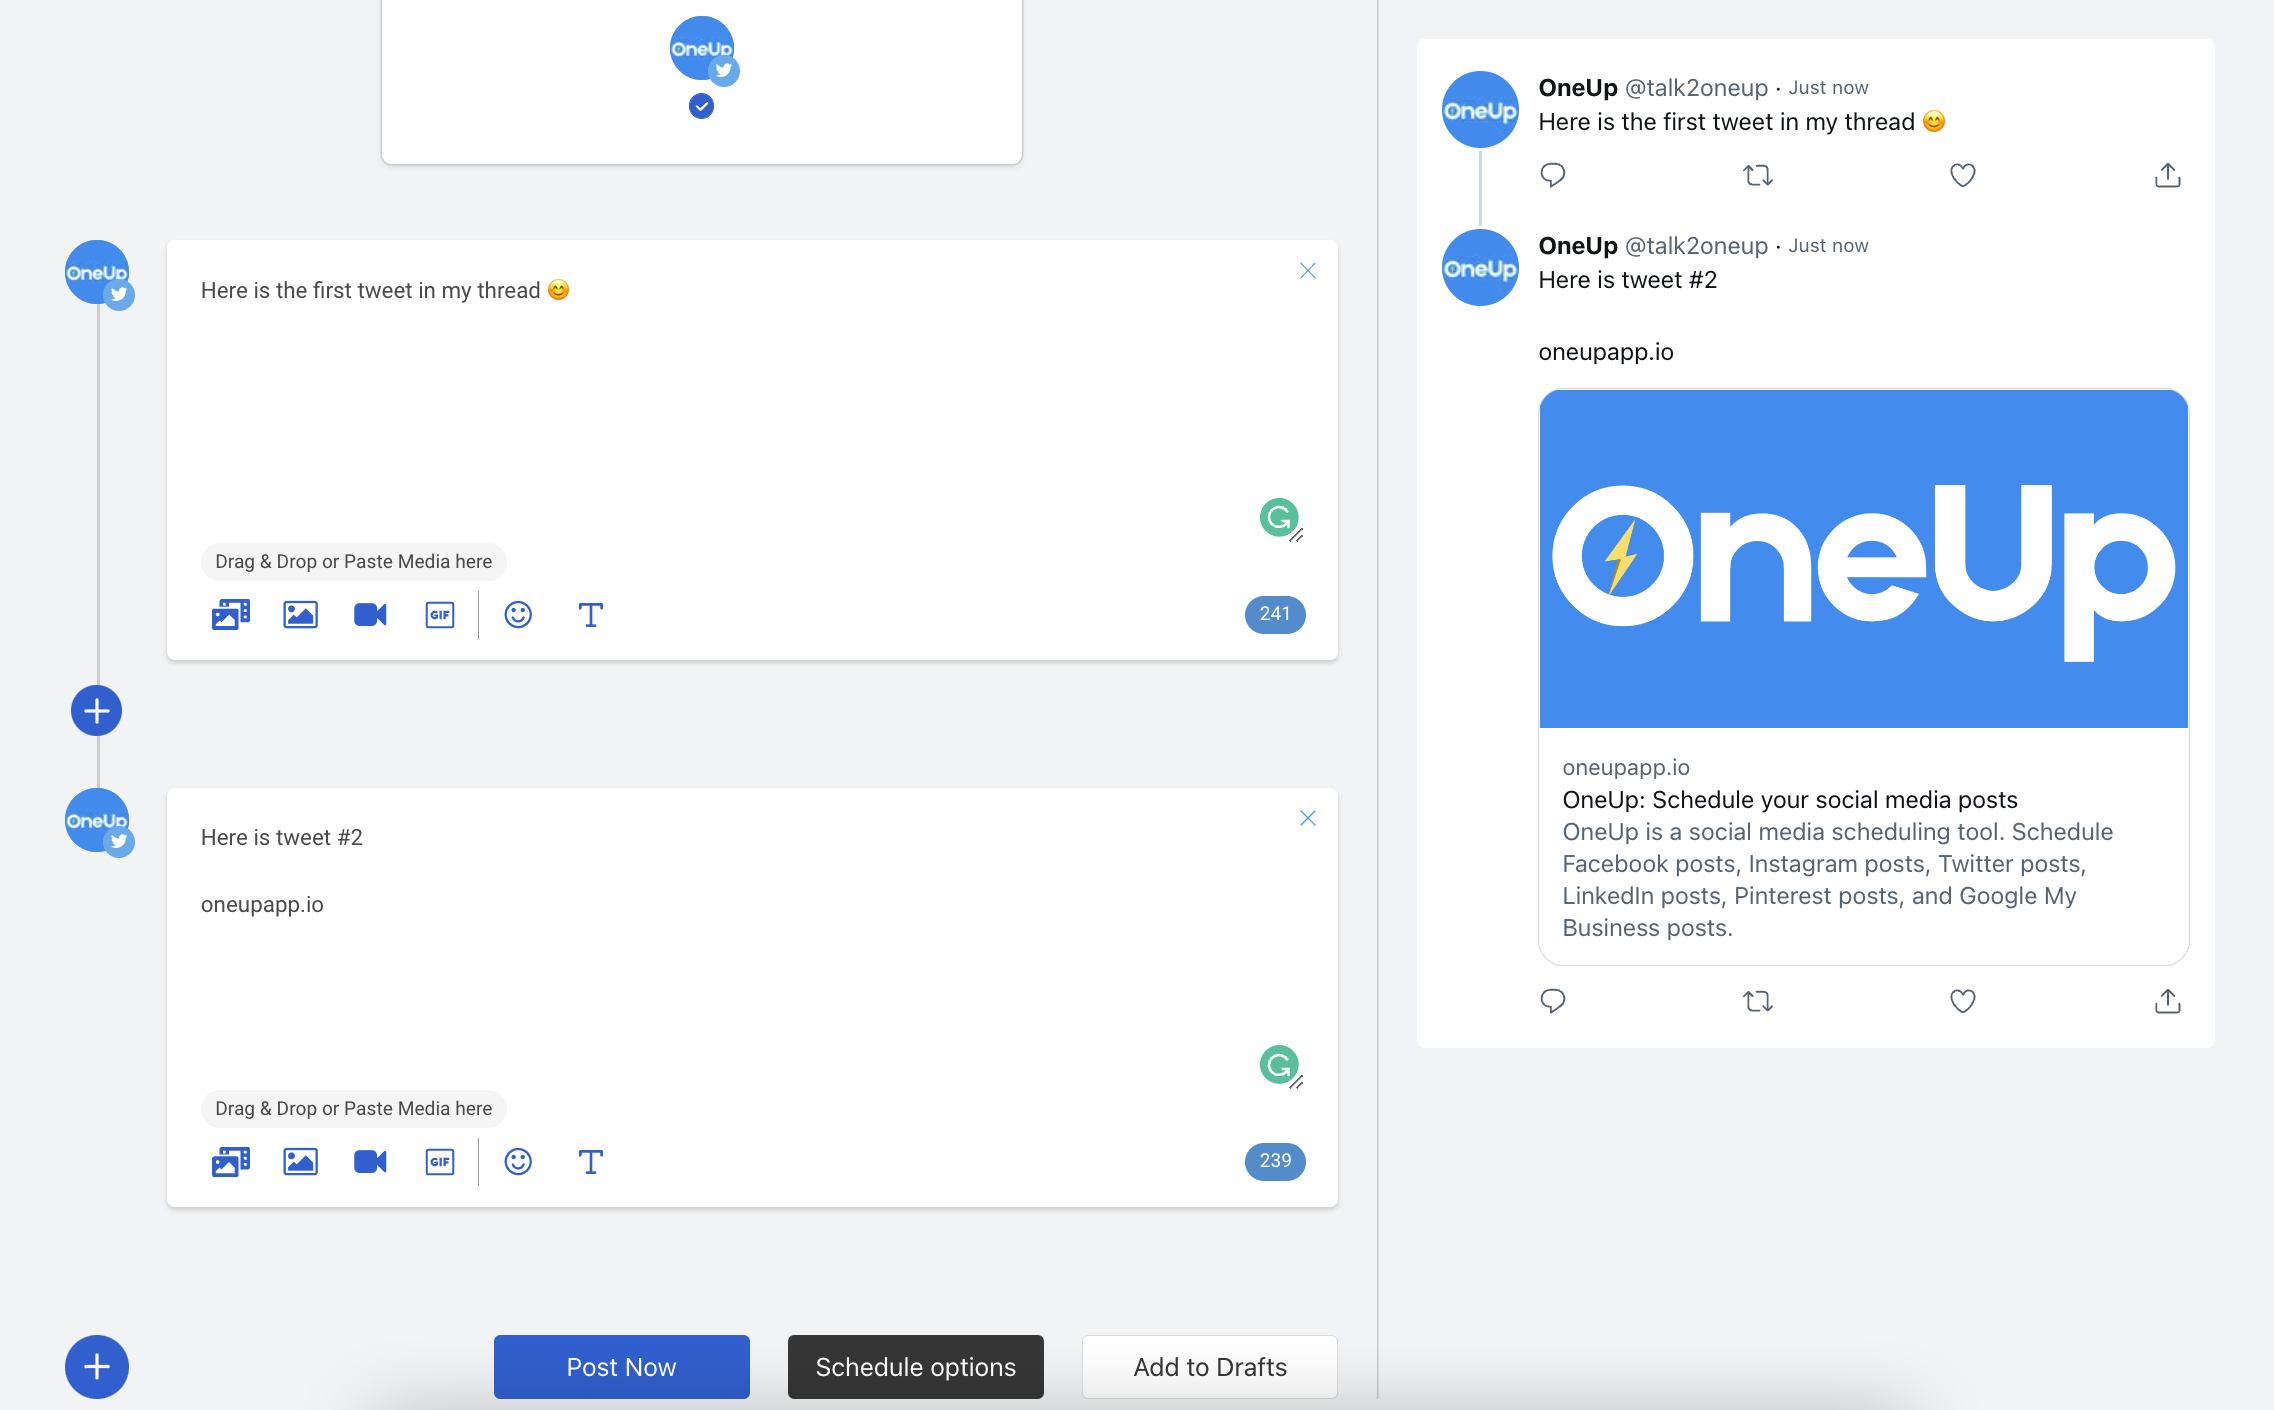
You can preview how your X thread will look while you are creating it.
To add another part to your X thread, click the blue “+” button. You can add as many parts to your thread as you want, and you can even insert new tweets in the middle while scheduling your X thread.
Another cool feature in OneUp – you can paste in a long text and it will automatically split your long text into individual tweets:
which becomes…
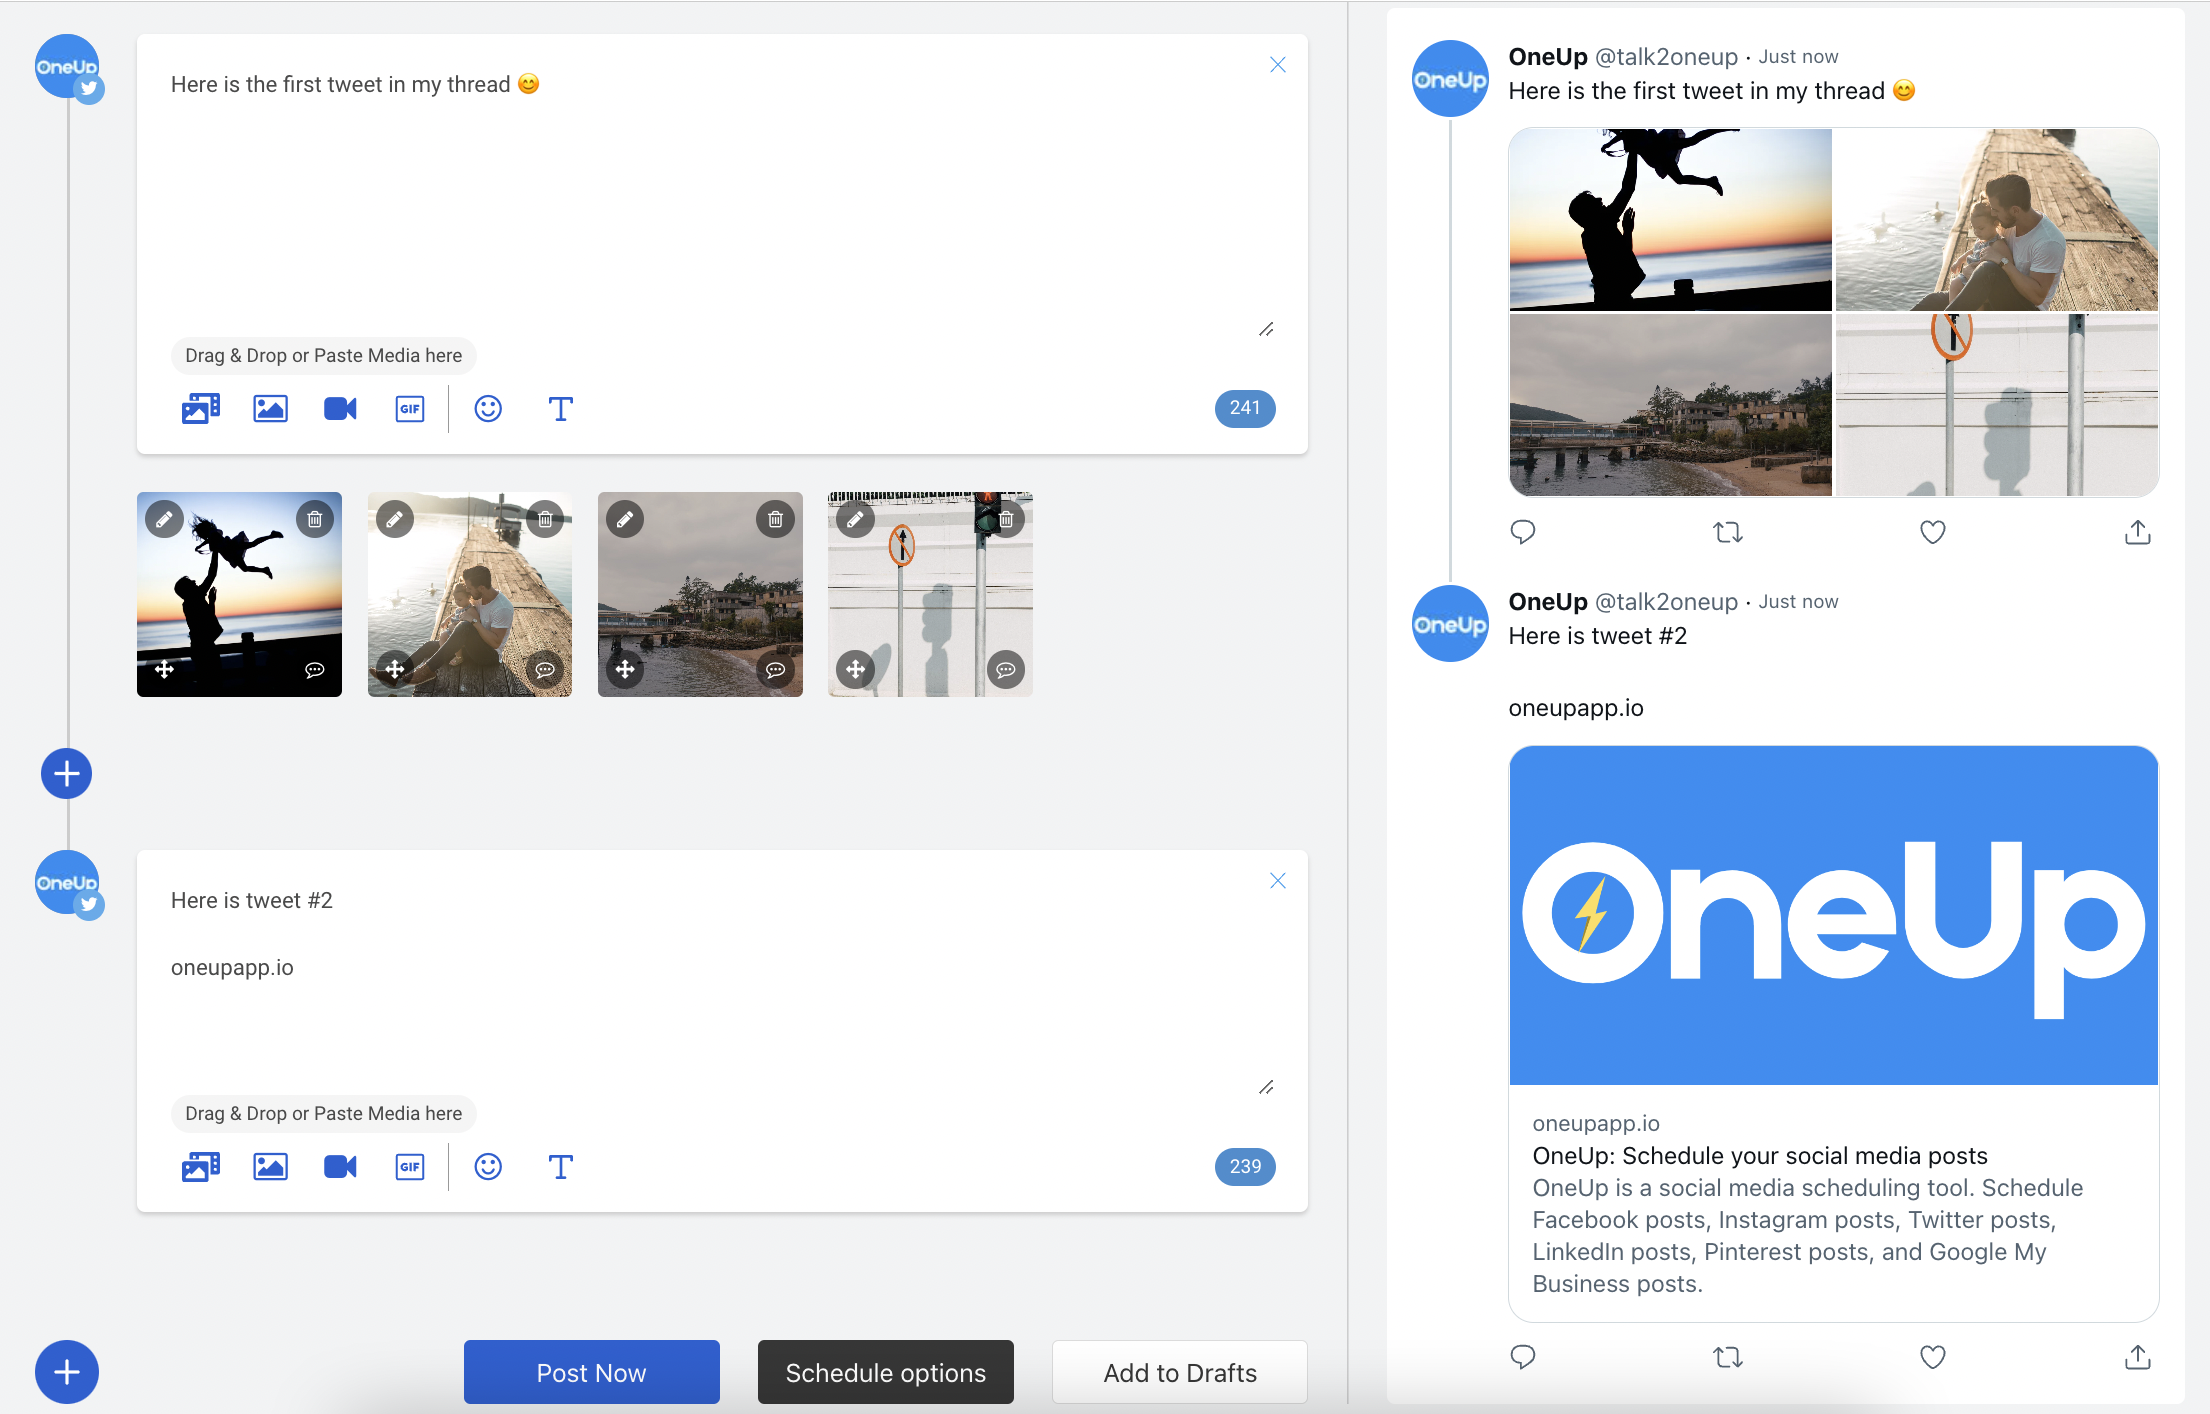
And just like on X, you can add up to 4 images, a GIF, or a video to any of the tweets in the thread:
You can also add links to your X thread, and they will post with the link preview.
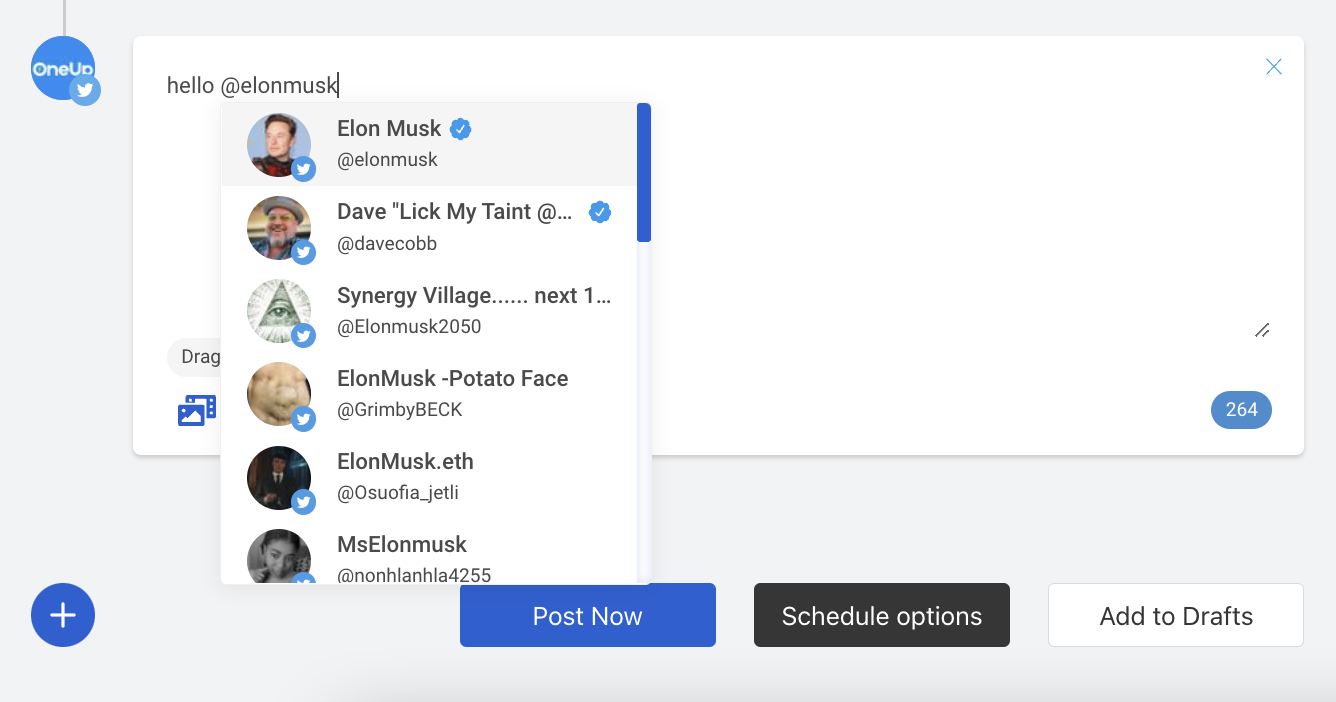
You can add Alt Text to your images, and you can @mention accounts using OneUp. Just type “@” and some letters and you will get suggested accounts:
Once you’re finished, you can either schedule your X thread, or save it to your Drafts folder.
Here is OneUp’s website if you want to schedule X threads: www.oneupapp.io
Here’s a video showing how to schedule X threads using OneUp: