Scroll down for a free Pinterest Pin scheduling tool.
To schedule your Pins for the future on Pinterest, you have 2 options:
Use the scheduler on Pinterest, or
Use a 3rd-party Pinterest scheduling tool
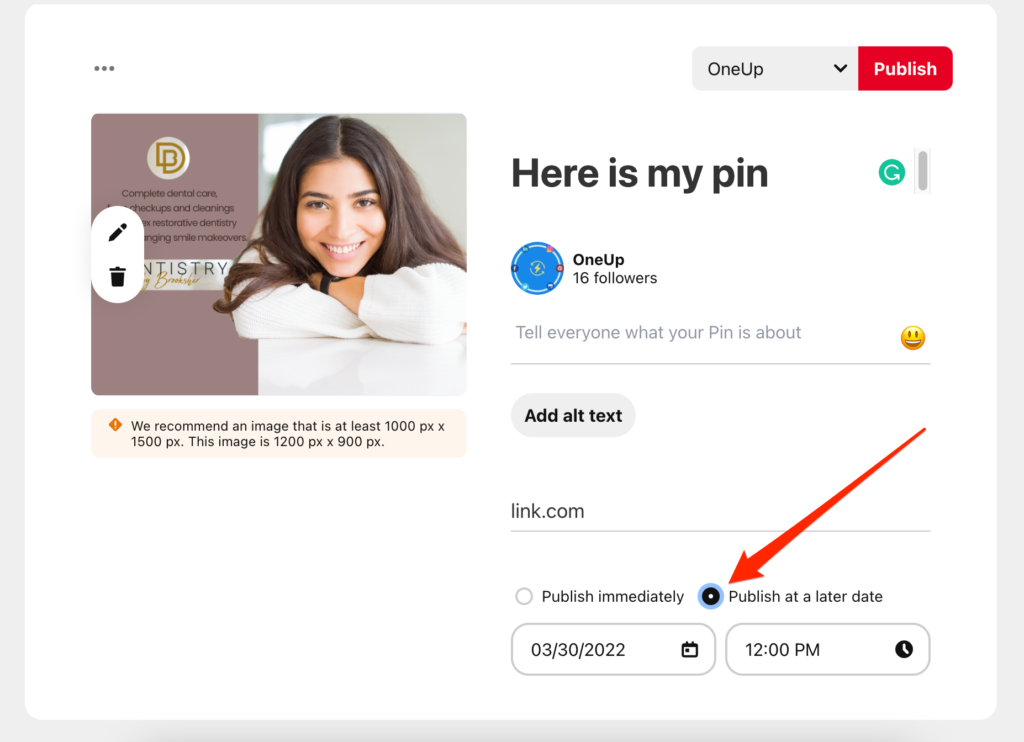
If you use the scheduler on Pinterest, you can choose the “Publish at a later date” option while creating your post:
However, when you try to choose the date you want your Pin published, it only lets you schedule up to 2 weeks into the future. Everything after 2 weeks is grayed out:
If you want to schedule Pins as far into the future as you’d like, you can schedule Pins to Pinterest for free using a 3rd-party Pinterest scheduling tool like OneUp.
Here is how OneUp works 👇
How to schedule Pinterest posts for free
Connect your Pinterest account(s) to OneUp (it’s free, and both business and personal Pinterest accounts are supported)
Click “Create a post”
Select your Pinterest account(s) and which Board you want to post to
Type in your Pinterest post, add your Pin Title, destination link, and image
Choose whether you want it to post once or repeat, then schedule your post
Here are those steps with images:
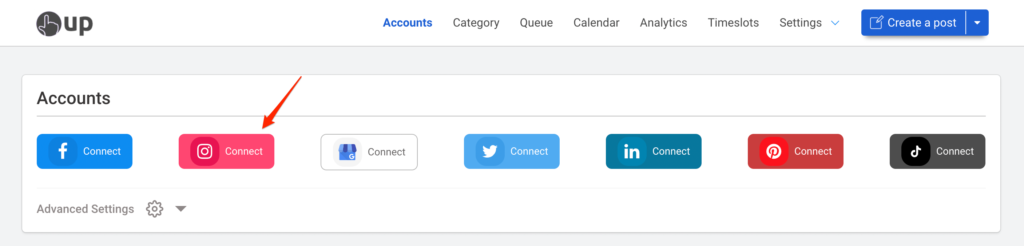
First, connect your Pinterest account from the Accounts page in OneUp:
OneUp supports both business and personal Pinterest accounts.
Then click the “Create a post” button in the top right corner.
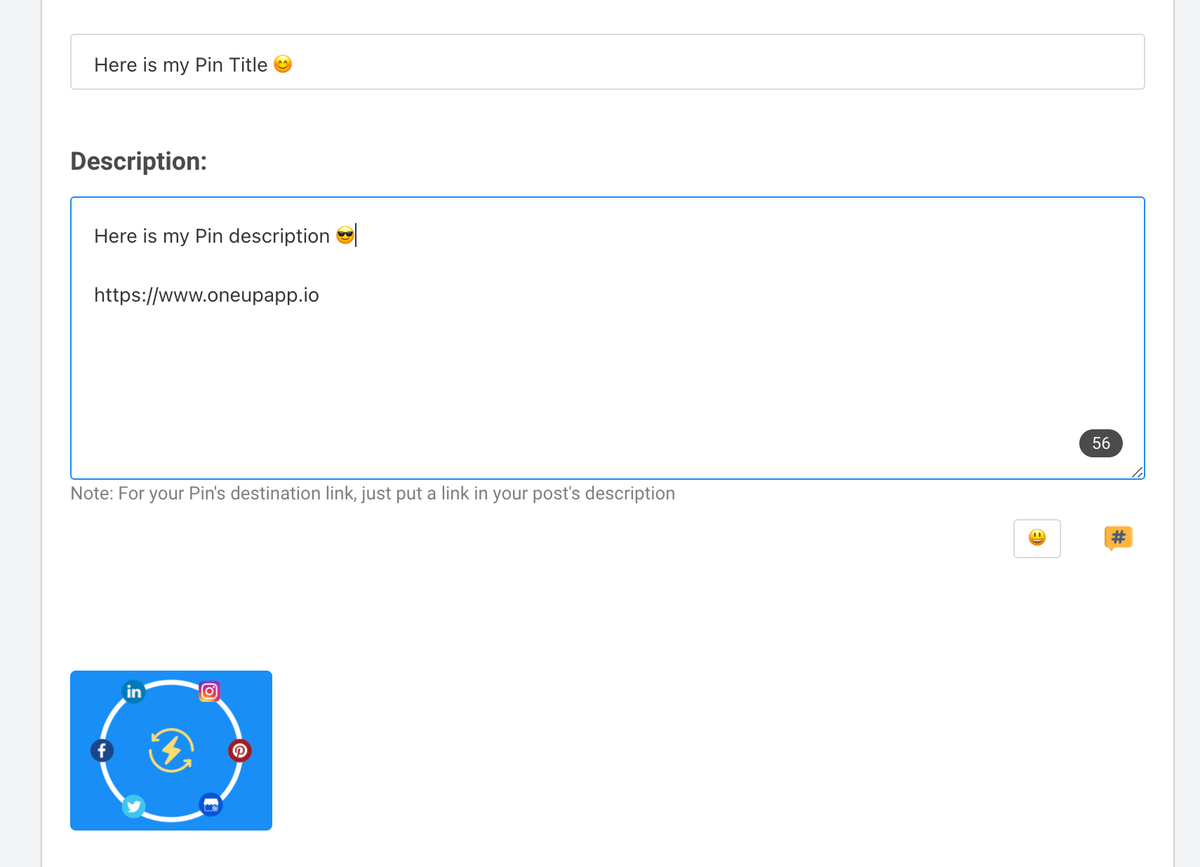
Just like when you create Pins on Pinterest itself, OneUp allows you to add Pin titles, descriptions, and destination links for your Pins:
OneUp even has a Canva integration, so you can create a Canva image and add it to your post without ever leaving OneUp.
Then choose for it to either post once or automatically repeat at whatever interval you want, and then schedule your Pin:
You can schedule your Pinterest Pins as far into the future as you want. You are not limited to the 2-week window like when using Pinterest’s native scheduler.
In addition to Pinterest, OneUp also supports Instagram, Facebook, Twitter, LinkedIn, TikTok, and Google My Business.
Pinterest currently boasts 431 million daily active users. This is slightly down from the peak at the height of the pandemic, but it is still solid year-over-year growth for Pinterest.
If you are selling anything visual, having a presence on Pinterest is a must.
According to Pinterest, 60% of Pinterest users are women and 40% are men. So Pinterest is not just for people whose target audience is women.
Also, 45% of people in the US with a household income over $100K are on Pinterest, so if you sell high-priced items, Pinterest may be a good channel for you.
Pin vs Idea Pin
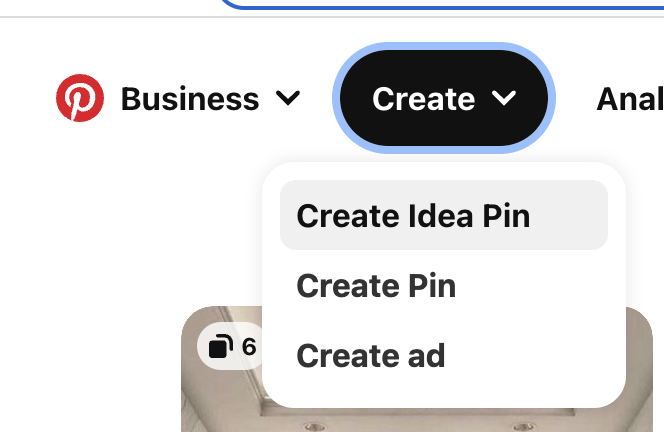
While on Pinterest, you may have noticed the option to create an Idea Pin.
Cool. What’s an “Idea Pin”?
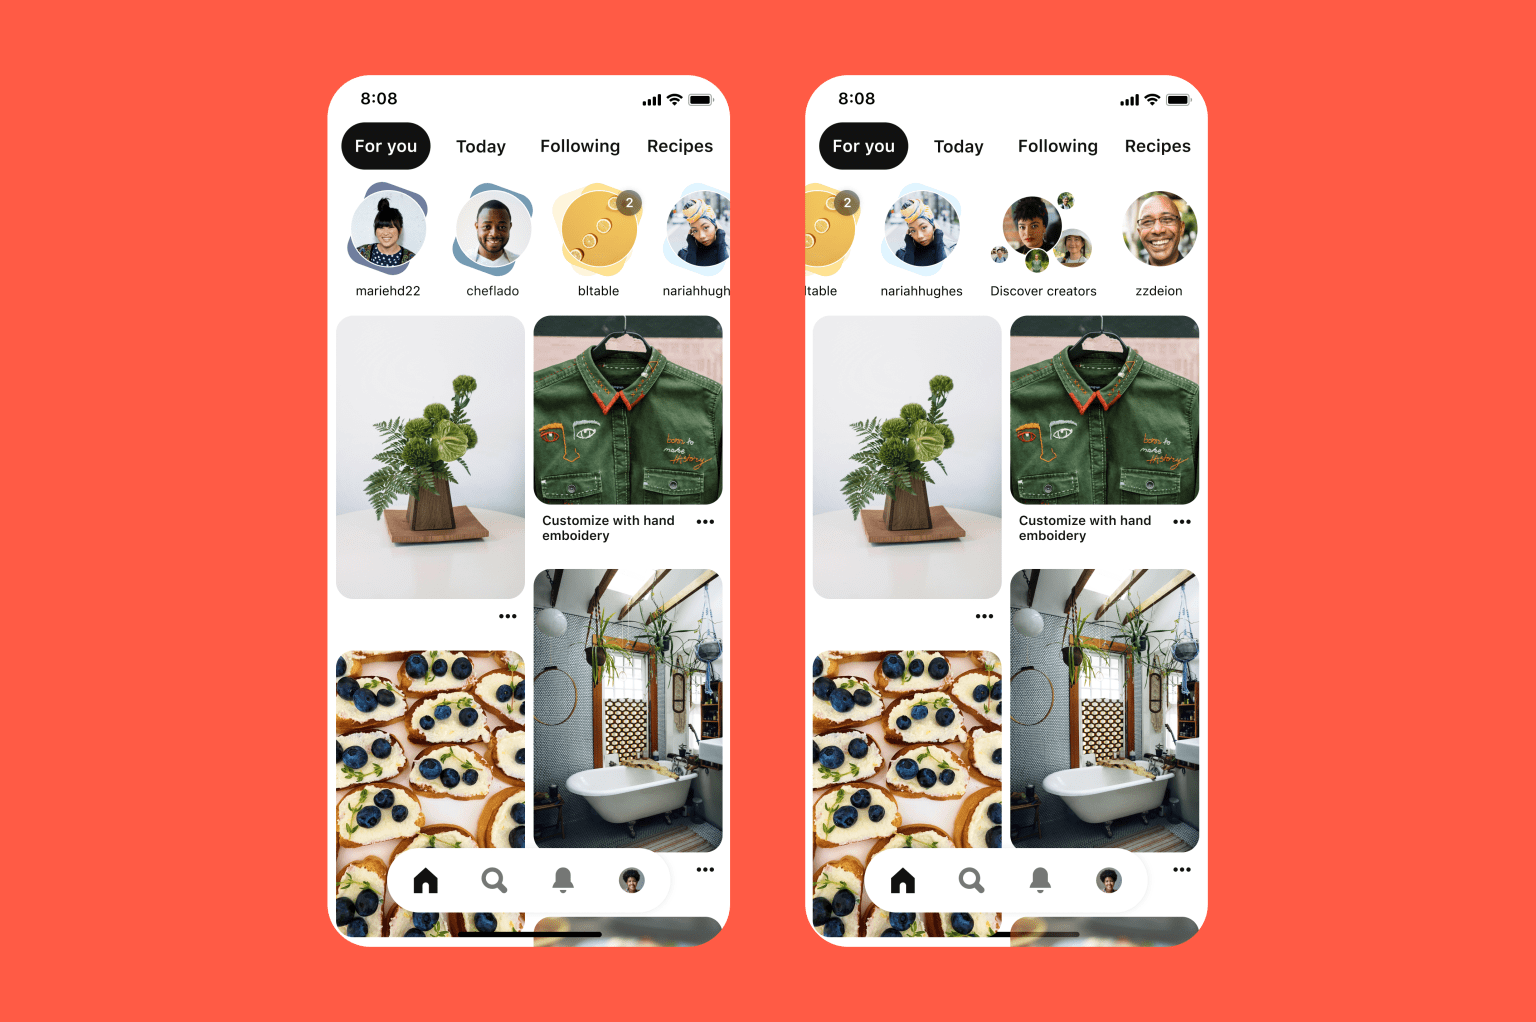
An Idea Pin is basically Pinterest’s version of Stories.
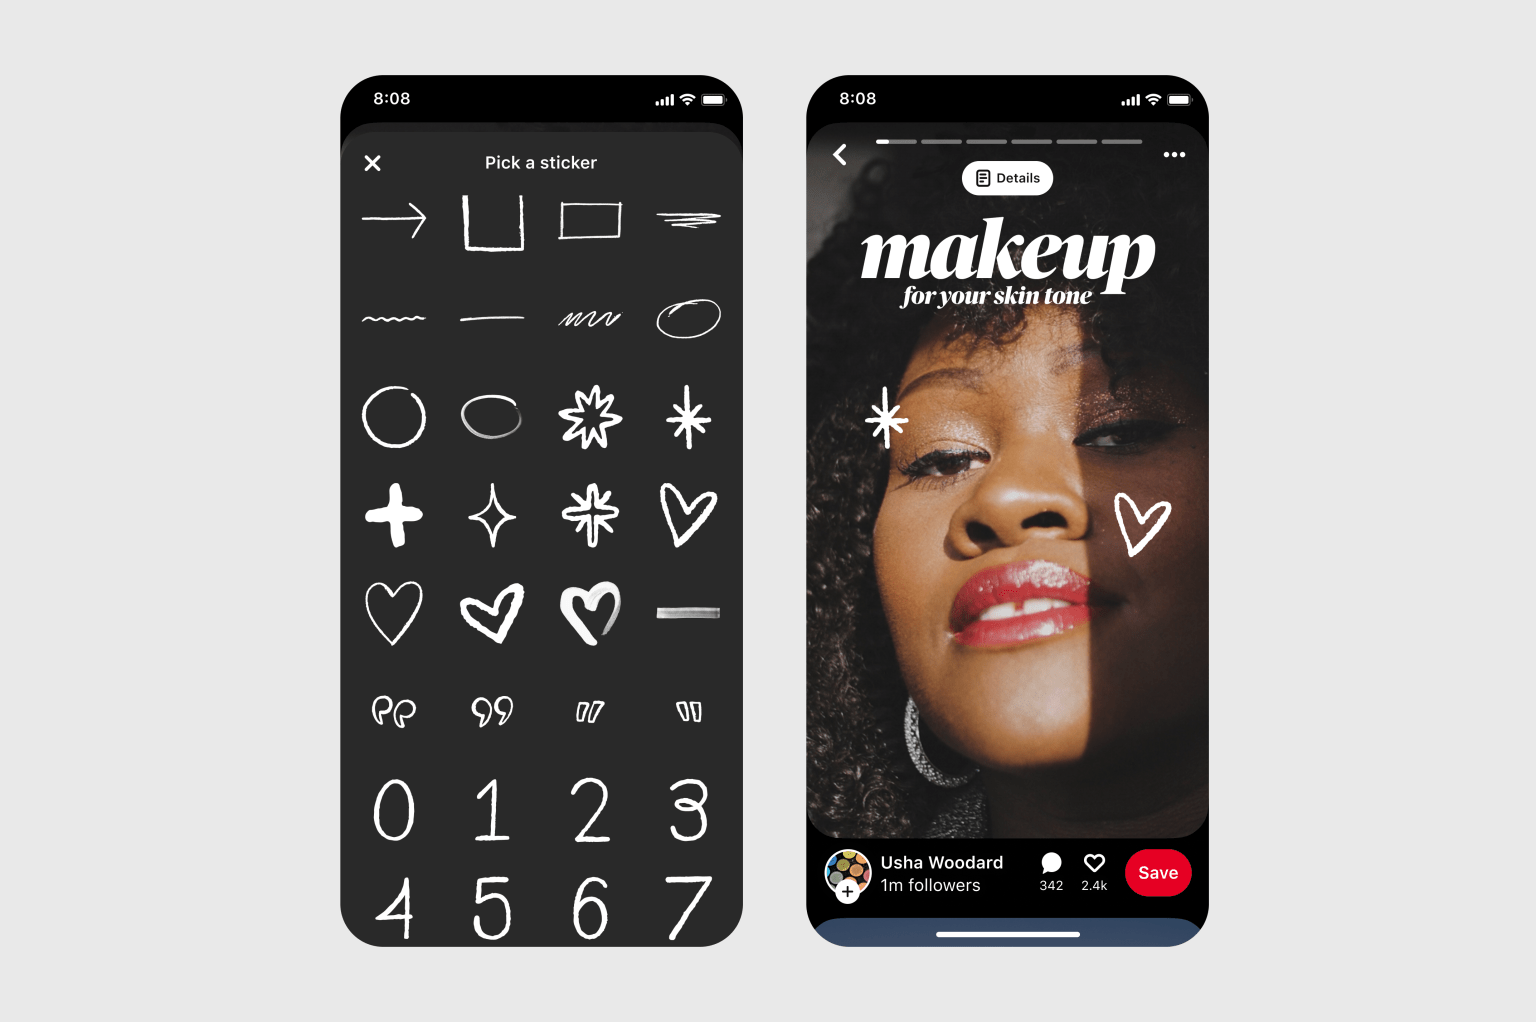
You can create an Idea Pin with up to 20 images and videos, using tools like voiceover recording, background music, transitions and other interactive elements, and they will play as consecutive slides in your Idea Pin.
Just like regular Pins, you can add a Title and choose a Board for your Idea Pins:
Pinterest has found that Idea Pins were more engaging than standard Pins, with 9x the average comment rate. The number of Idea Pins (previously known as Story Pins) has also grown by 4x since January, as more creators adopted the format.
This makes sense given the prominent placement Idea Pins get.
Can you schedule Idea Pins for the future?
Unfortunately Idea Pins cannot be scheduled on Pinterest, and they also cannot be scheduled using a Pinterest scheduling tool like OneUp.
Schedule your Instagram Reel for a date and time in the future
Here are those steps with screenshots:
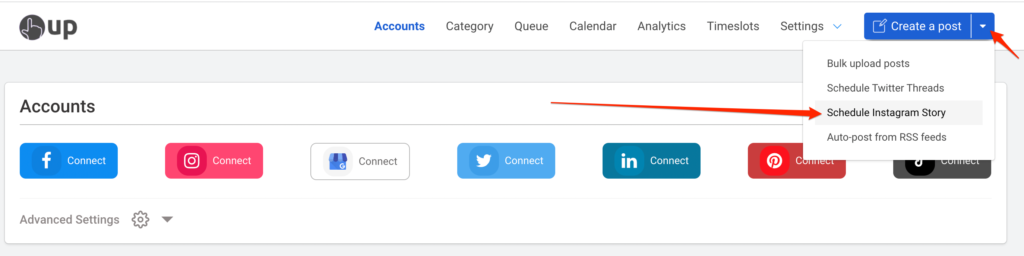
On the Accounts page of OneUp, connect your Instagram account
2. Click “Schedule Instagram Story”
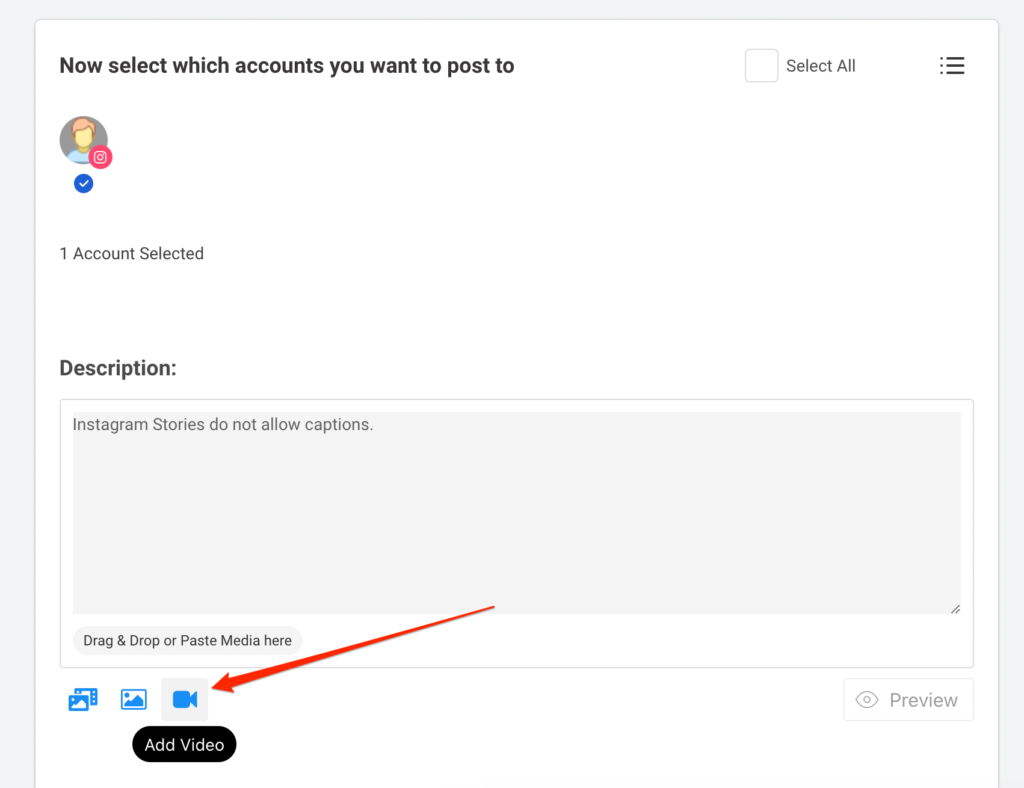
3. Upload your video
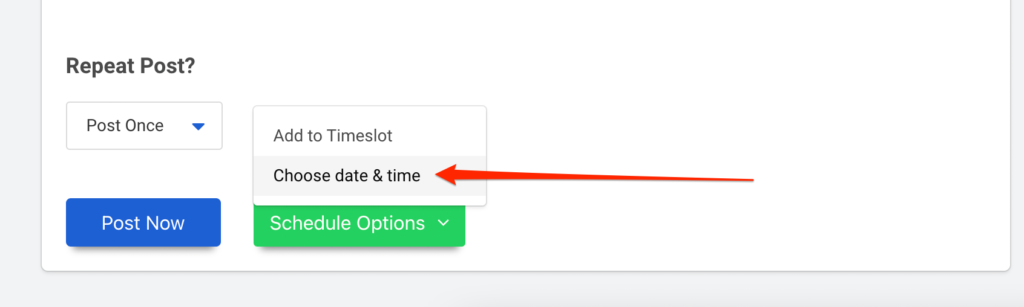
4. Then schedule your Instagram Reel
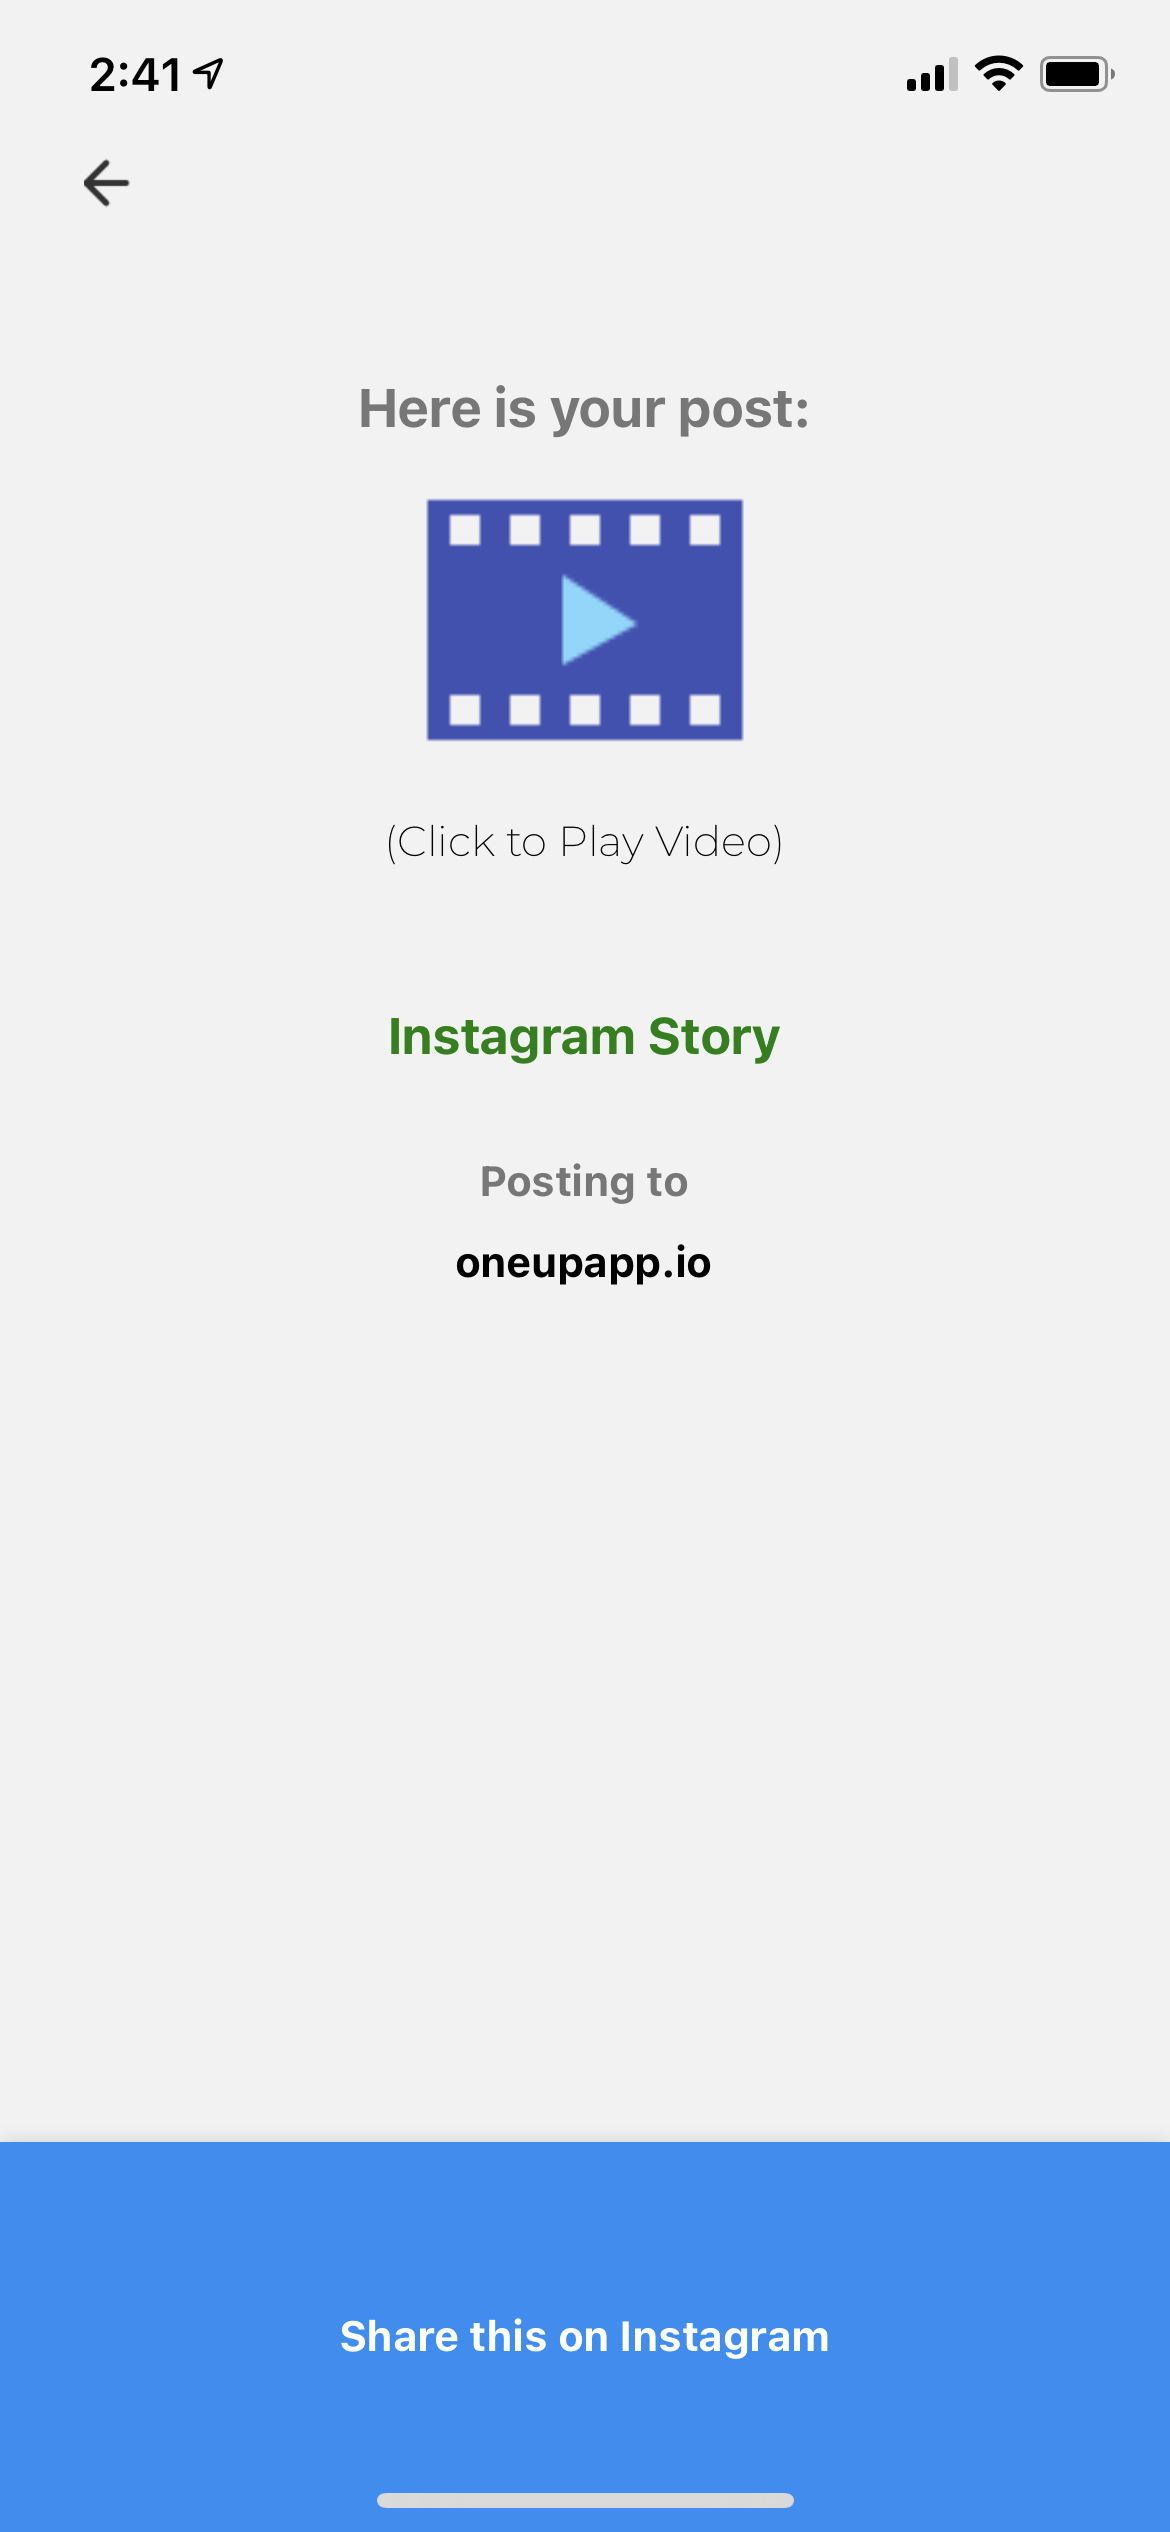
When the scheduled time comes, you will receive a notification on your phone about your Instagram Reel being ready. Tap that notification, and your Reel will open in the OneUp mobile app:
Click “Share this on Instagram”
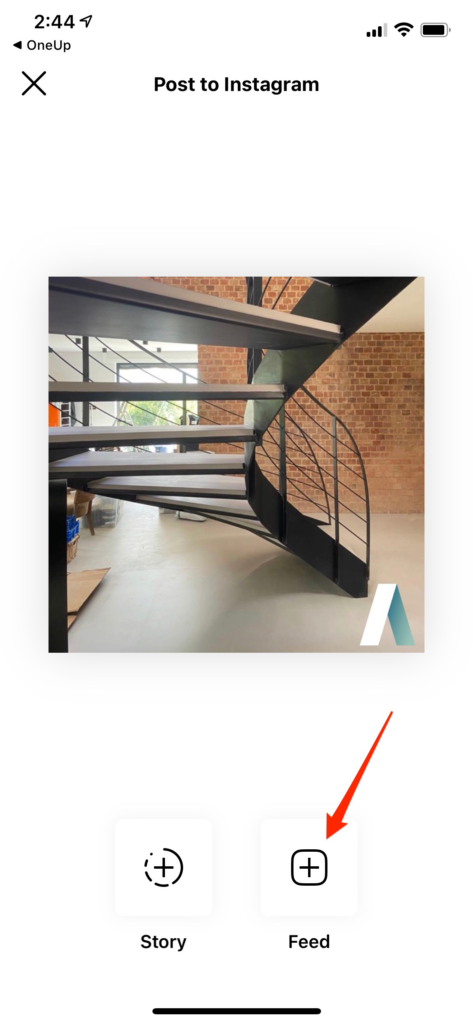
Then choose the “Feed” option:
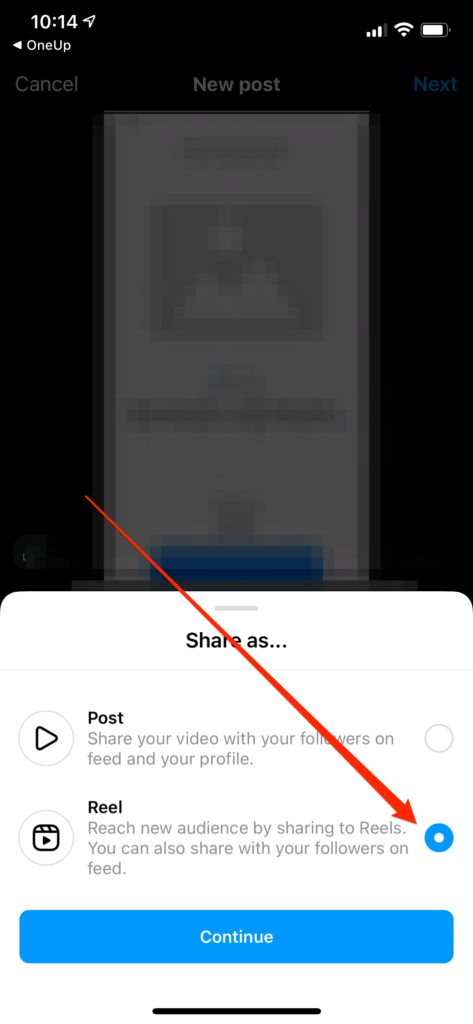
Once selected, you will see the option to post your video as a Reel:
This post goes over how to schedule posts on Stocktwits.
Stocktwits is a real-time social network for investors and traders. It is the largest social network for finance.
Many Stocktwits users would like to be able to schedule their posts for the future, rather than publishing all their posts in a short amount of time.
OneUp is a social media scheduling tool that supports Facebook, Instagram, Twitter, LinkedIn, Pinterest, Google My Business AND… Stocktwits.
How to schedule a post on Stocktwits
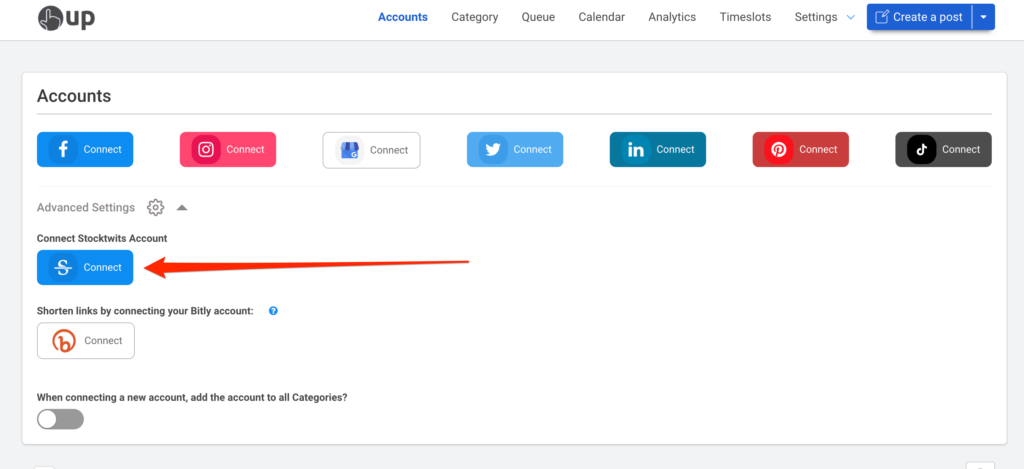
On the Accounts page of OneUp, you can connect your Stocktwits account (under Advanced Settings):
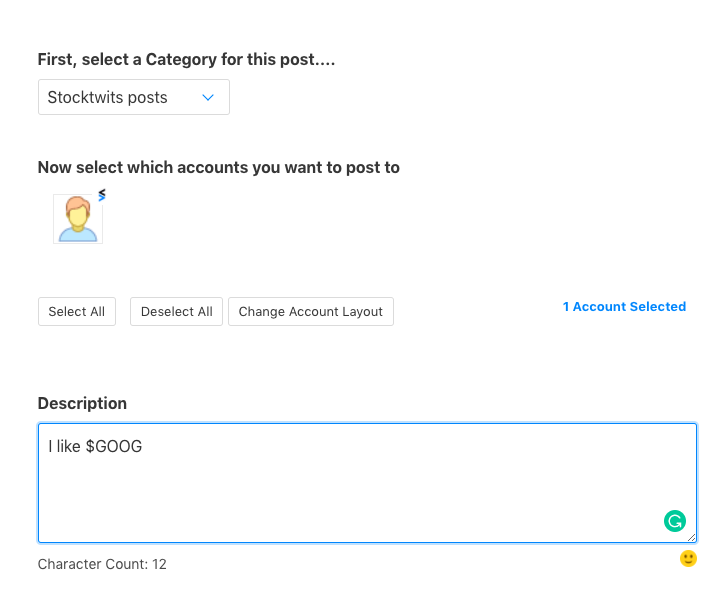
Then click “Create a post”:
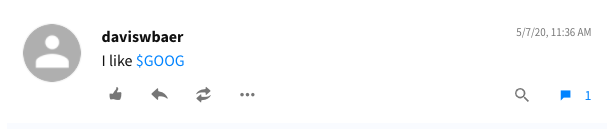
Select your Stocktwits account, then type in your post. Just like on Stocktwits, you can add cashtags to your post by adding a “$” followed by a ticker symbol.
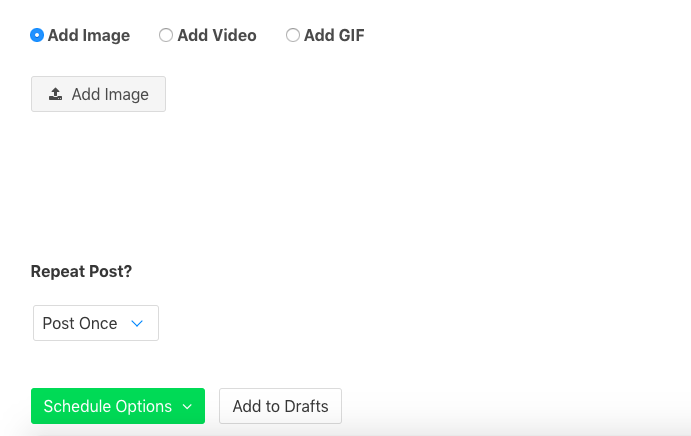
Then optionally add an image to your post, and choose whether you want it to publish once, or to automatically repeat.
After, you can either post it now, or schedule it for a date and time in the future.
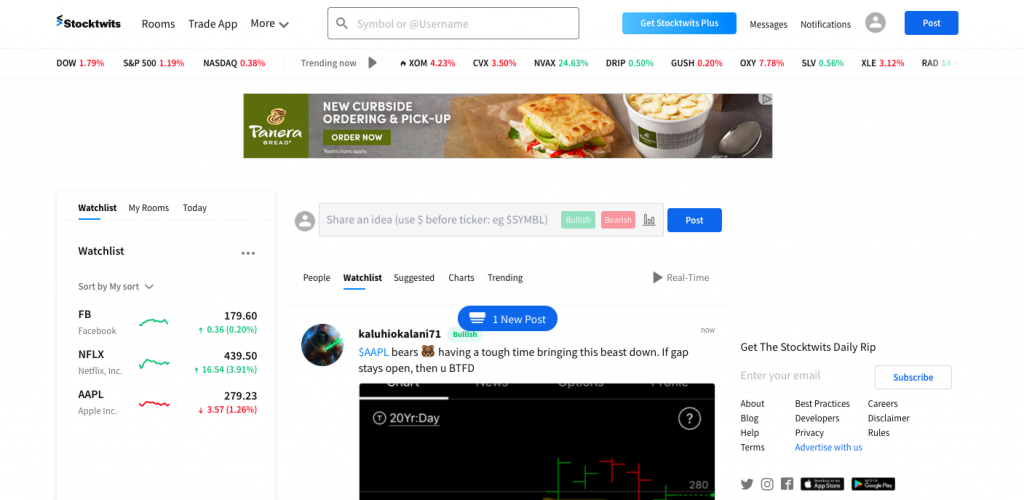
Here is how the post looks once it’s published on Stocktwits:
Check out OneUp to schedule your Stocktwits posts.
This blog post shows you how to turn off retweets from your timeline.
Twitter can be great. However, Twitter can be annoying when all you see is retweet after retweet in your timeline. You’re reading this because you just want to see original tweets, and not see any retweets in your timeline.
Here are the steps to do so:
How to mute retweets from your timeline on Twitter
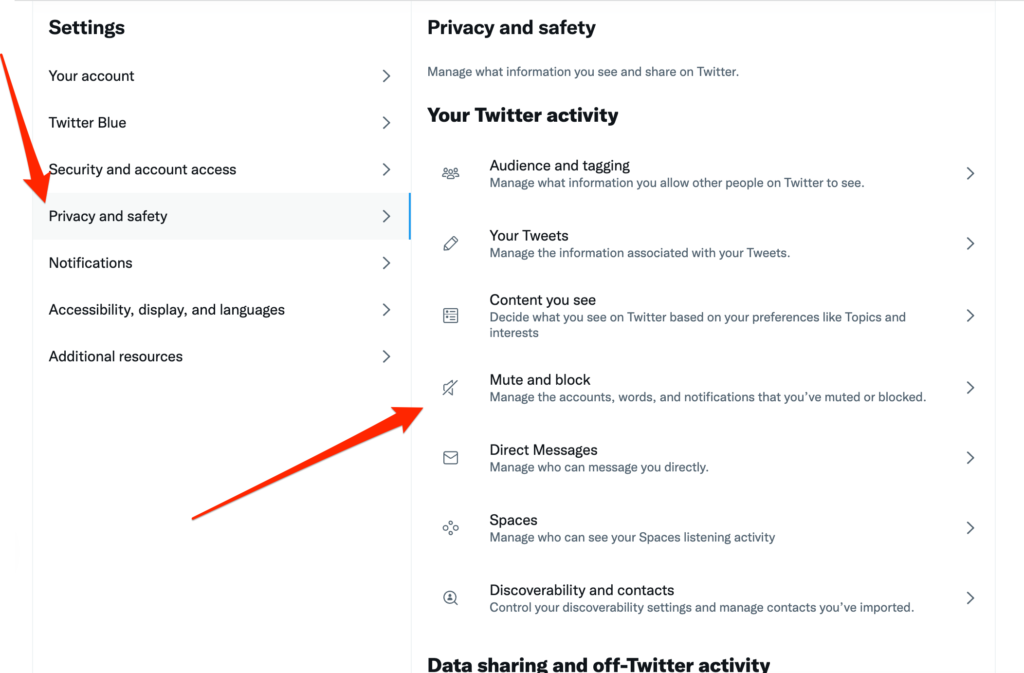
On Twitter, go to “Settings”, then “Privacy and safety”
Then click “Mute and block”
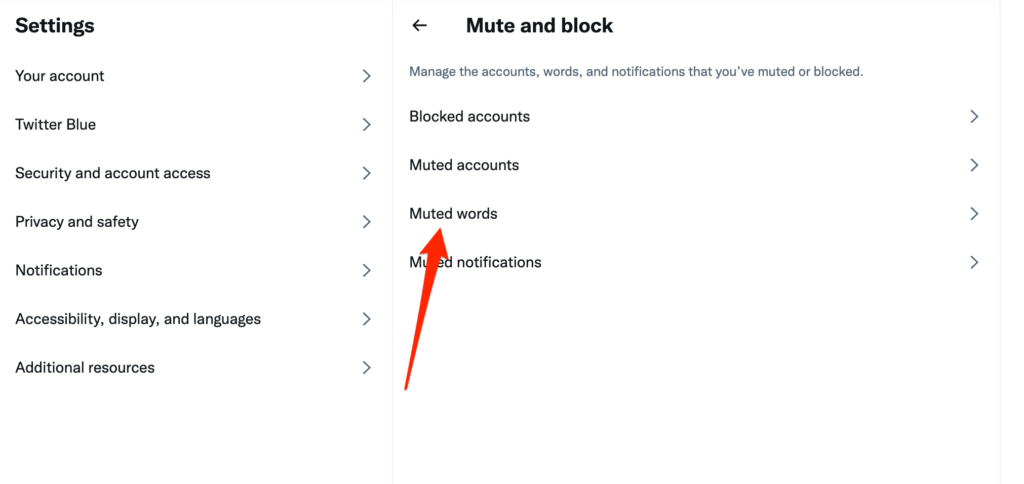
Click “Muted words”
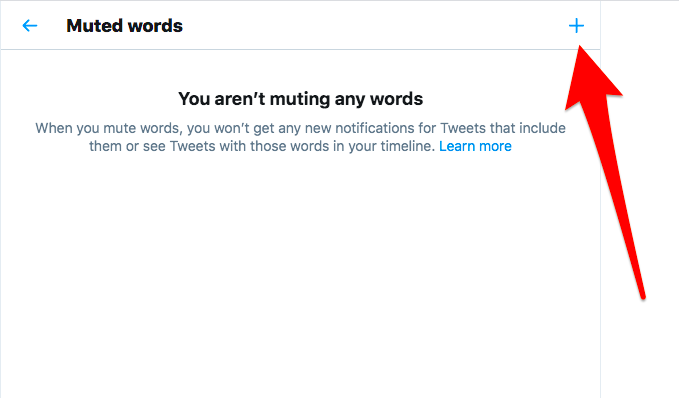
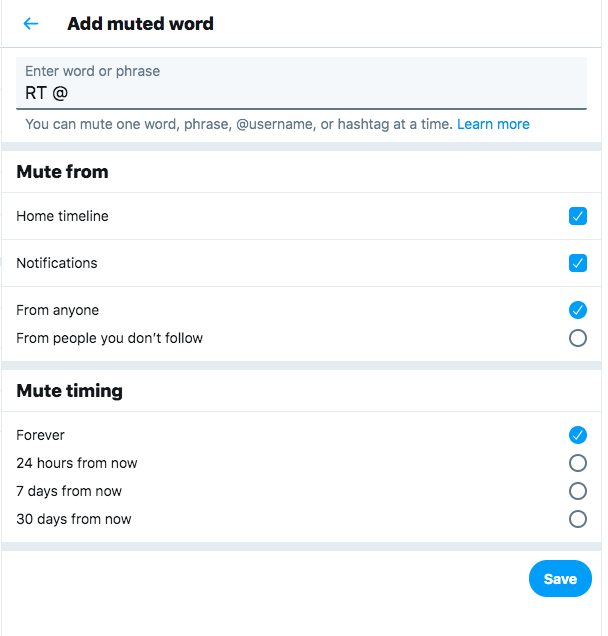
Click the “+” icon
Add “RT @” as the phrase
Click “Save”
Enjoy your Twitter timeline with no retweets clogging your feed
Here is how to mute retweets screenshot by screenshot
Click the “+” iconAdd “RT @” as the phrase, then click “Save”
Why does it work?
Behind the scenes, Twitter sees native retweets like original retweets. If you take a look at a native retweet through Twitter’s API, you will see that the full_text starts with “RT @username”. Because of this, we can filter them through with the “RT @” phrase.
Enjoy your Twitter timeline without all the retweets 😊
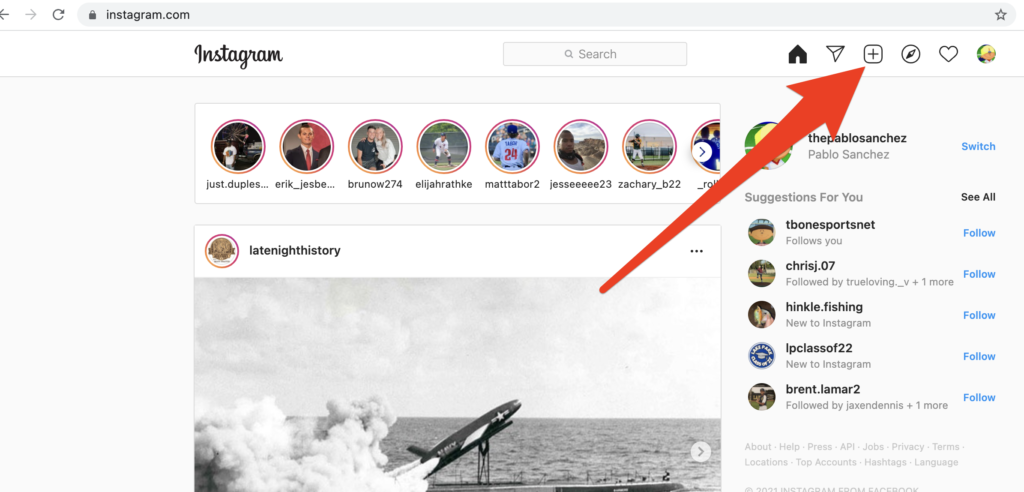
As of October 2022, you can now post to your Instagram account from a computer 🎉
While on Instagram from an internet browser, you will now see the + option for adding a post:
Say goodbye to download images, sending it to your phone, and then posting from the Instagram app.
If you need a FREE way of scheduling Instagram posts for the future, scroll to the very bottom of this article 👇
Here was how to post to Instagram from a computer prior to October 2021:
This post shows you how to post on Instagram from a desktop computer, laptop, Mac, or PC for free in 2021.
Instagram does not let you post pictures directly to their website from a web browser on a desktop computer, laptop, Mac, or PC – but there is a way around it 🤓
Sure, you can email yourself photos, open up the email on your phone, save the photos, then post them on the Instagram app. However, that can get annoying quickly.
The solution: Most browsers have a way of letting you change the way a website shows to you. So even if you are on a laptop or desktop, you can have a website like Instagram show you the mobile version of the website, which will allow you to schedule Instagram posts from a computer – for free.
That is what we are going to do 😊
If you want to schedule Instagram posts for the future from a computer FOR FREE, scroll to the bottom of this article.
How to post to Instagram from a computer for free
Sign into Instagram
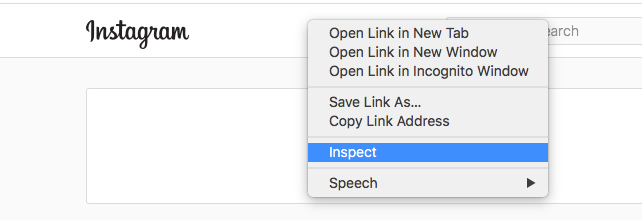
Right-click anywhere on the screen and click Inspect
Click the tablet/phone icon
Refresh the browser window
Click the “+” button to create your post
Post to Instagram from your computer
Here are those steps with screenshots:
How to post to Instagram from Google Chrome
To post to Instagram from a computer using Chrome, follow these steps:
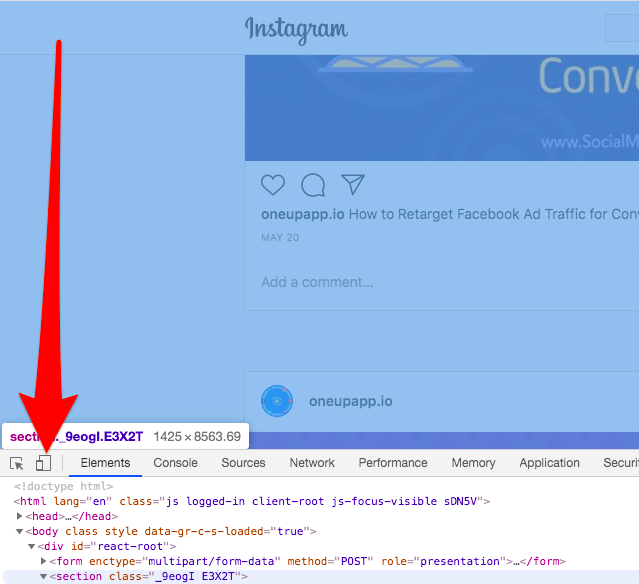
Using Google Chrome, go to Instagram.com and sign in. Next right-click anywhere on the page and select Inspect from the list.
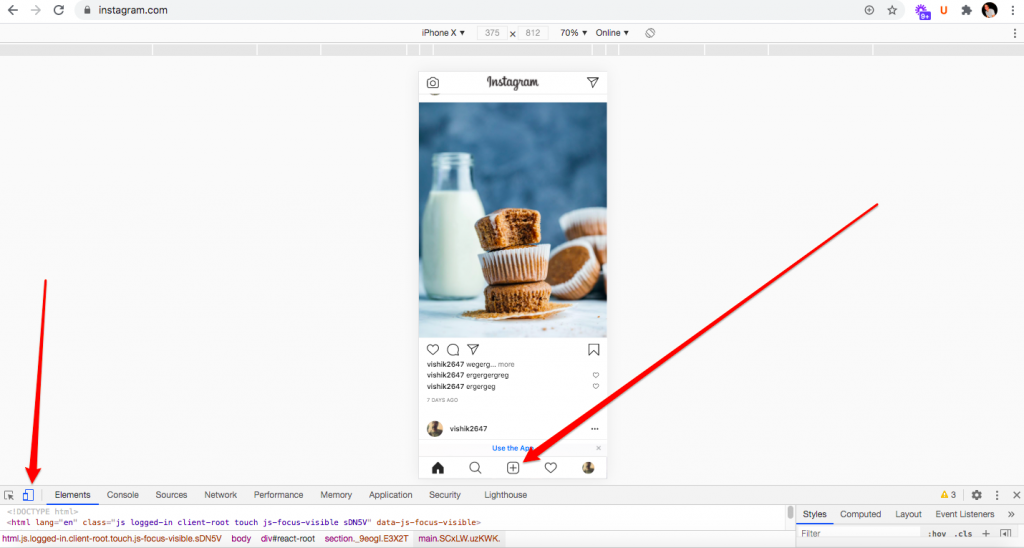
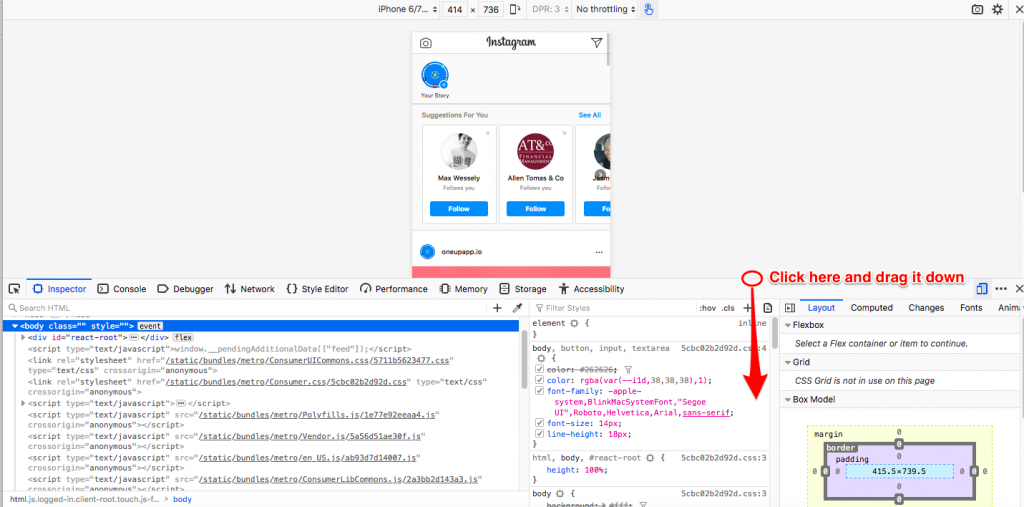
Part of the screen will be covered up with the Inspector tool, but we only care about the small icon of a tablet and phone, located in the top-left corner of the Inspector window. Click on it.
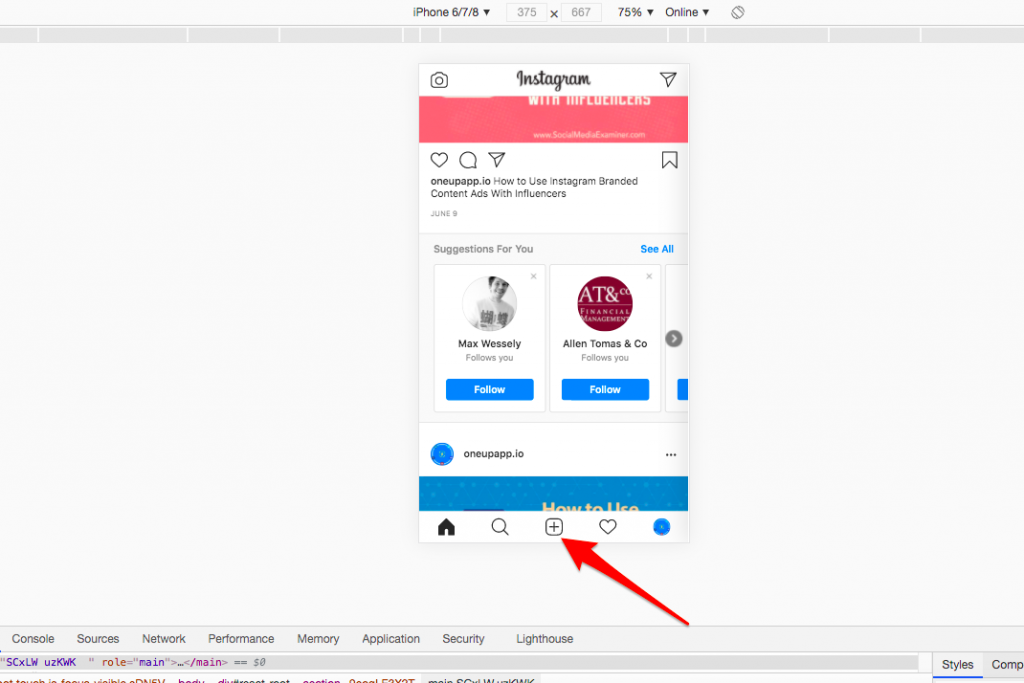
After, refresh the page (important step). Many people miss this step, so I will reiterate: You must refresh the Instagram tab in your browser!
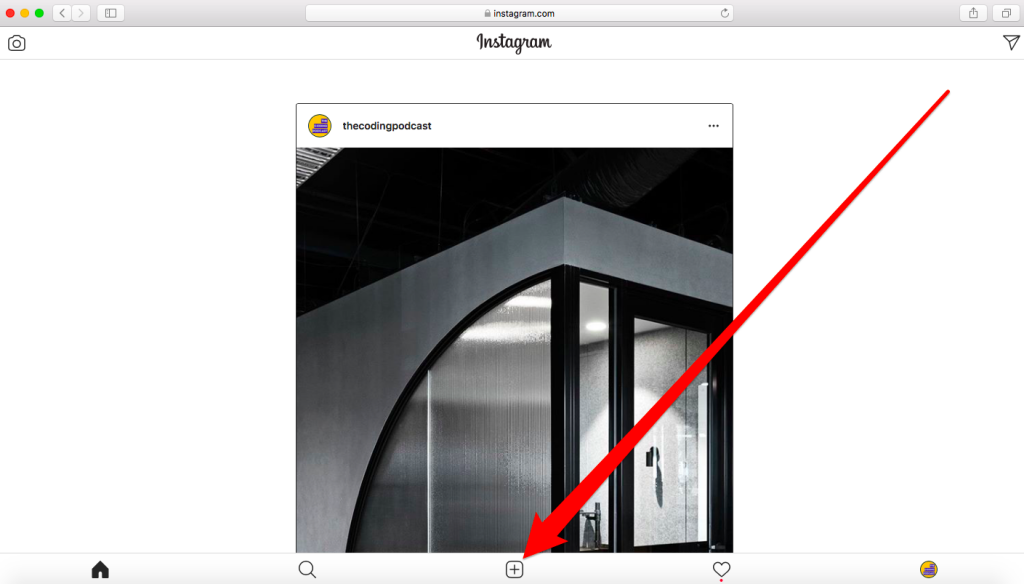
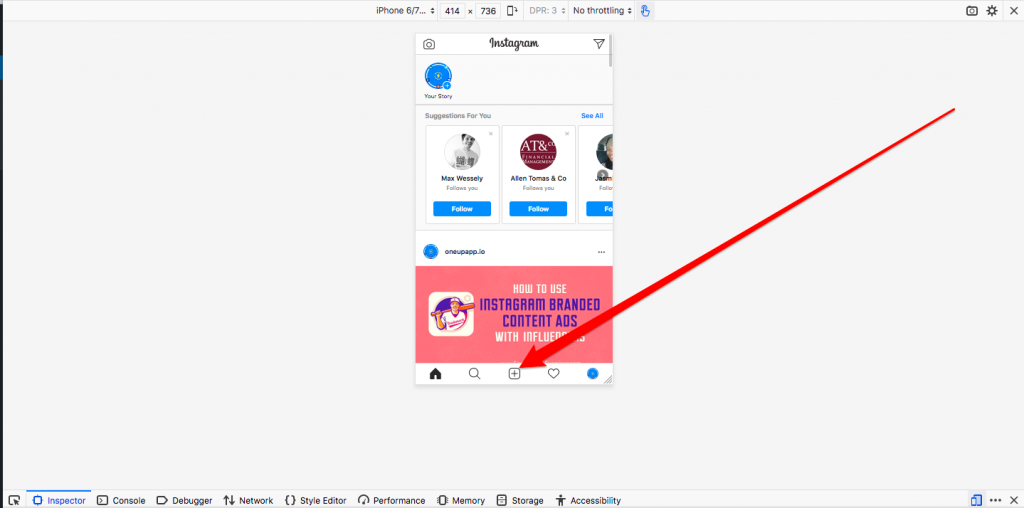
Once refreshed, you should see the + icon to create a post on Instagram at the bottom of the window.
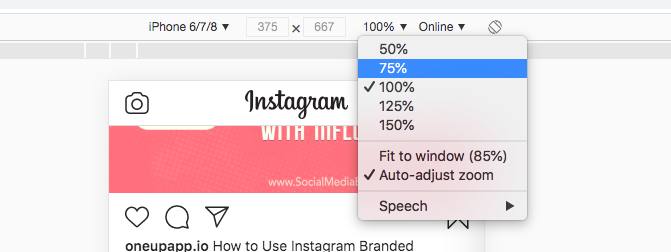
Tip: If you do not see the + icon, try zooming out from 100% to 75%.
Once you are finished, click on the tablet/phone icon again. Close the Inspector tool and refresh the website to go back to the normal version of the site.
How to post to Instagram from Safari
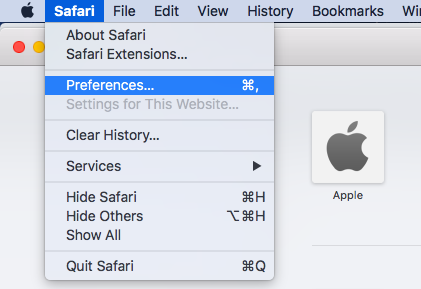
To post to Instagram from a computer using Safari, on the top menu of Safari, go to Safari > Preferences > Advanced. Select the box at the bottom that show Show Develop menu in menu bar.
Find the option to enable Develop options in Preferences under the Advanced tab.
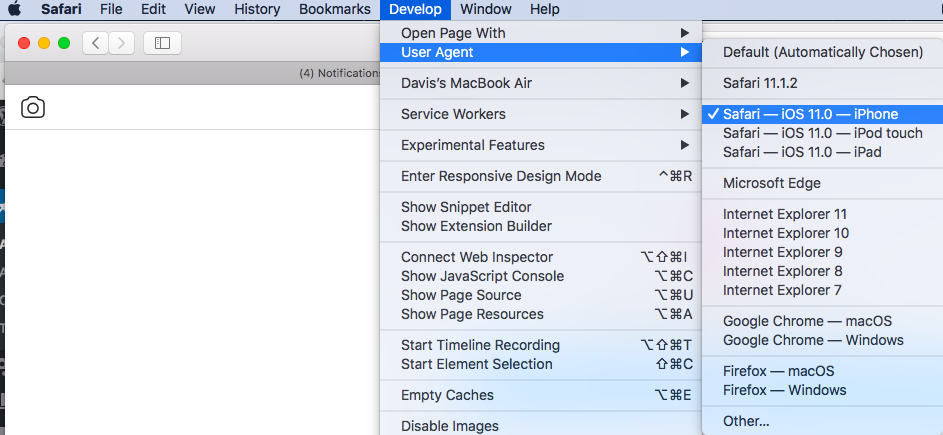
Next open a new Safari tab and click on Develop > User Agent > Safari — iOS — iPhone in the menu bar.
Next, go to Instagram.com and sign into your account. At the bottom of the screen will be a + icon — tap it and select a photo from your computer to upload. After the photo is uploaded, you can still apply filters and edit the photo as you would in the Instagram app.
When you’re done, make sure you change your user agent back to the Default setting to avoid viewing all websites in their mobile state.
How to post to Instagram from Firefox
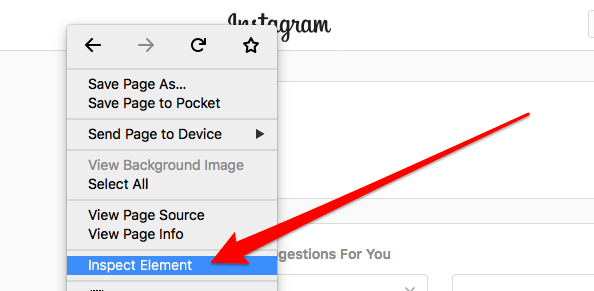
To post to Instagram from your computer on a Firefox browser, first go to Instagram.com and sign in. Next right-click anywhere on the page and select Inspect Element from the list.
You will then see the Inspector tool popup.
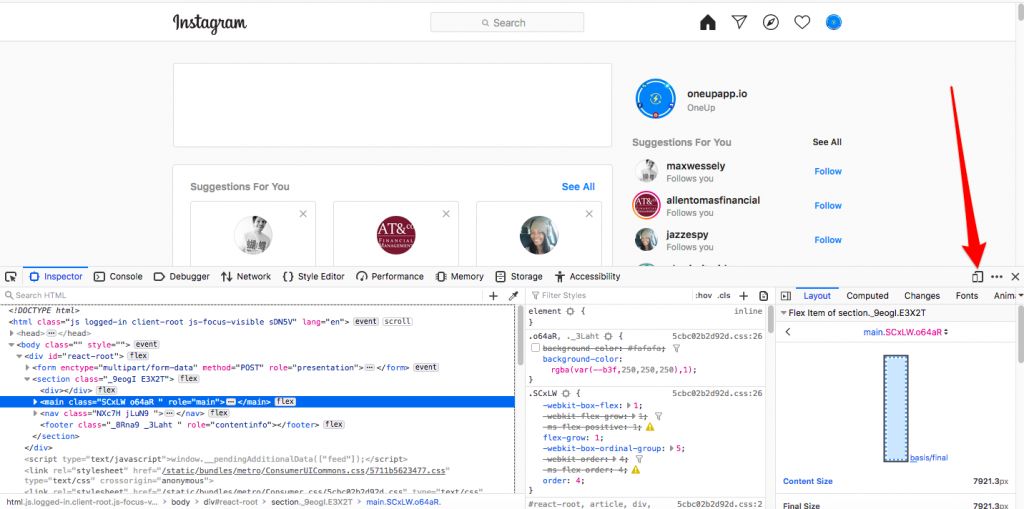
Find the Phone/Tablet icon and click it.
Next, drag the Inspector tool to the bottom of your screen, so you can see more of the phone view of Instagram.
After, refresh the page (important step). Many people miss this step, so I will reiterate: You must refresh the Instagram tab in your browser!
You should now see the + icon to start creating your Instagram post.
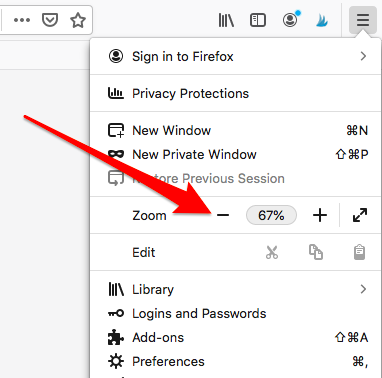
Tip: If you do not see the + icon, you may need to go to your Firefox settings and zoom out a little bit.
How to schedule Instagram posts for free
The methods above show how to post on Instagram from a computer, however, it does not let you schedule Instagram posts for the future.
To schedule Instagram posts, you need a social media scheduling tool like OneUp.
And yes, OneUp has a Free Plan 😊
In OneUp, first connect your Instagram account:
In the Schedule Post dropdown, choose “Schedule a post”.
Choose which account you want to schedule this post to, and create your post:
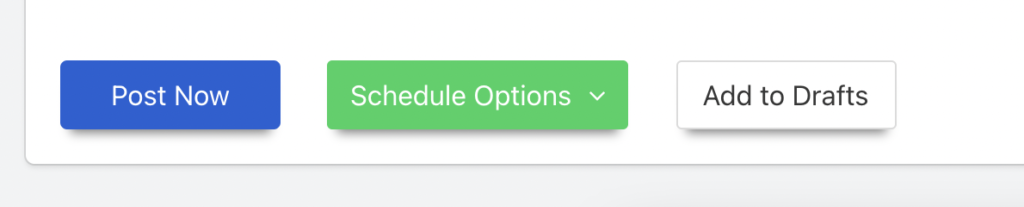
Then choose to either post once or repeat this post, and either “Post Now” or schedule it for a future date and time.
Single image posts, multi-image posts (AKA carousel), video posts, and Instagram Stories are all supported with OneUp, on both Personal and Business Instagram accounts 😊
Many people have images on Tumblr that they want to post on Instagram. But, the process of downloading the photo from Tumblr, then uploading onto Instagram one by one can be painstaking.
However, using the social media tool OneUp, you can do this easily.
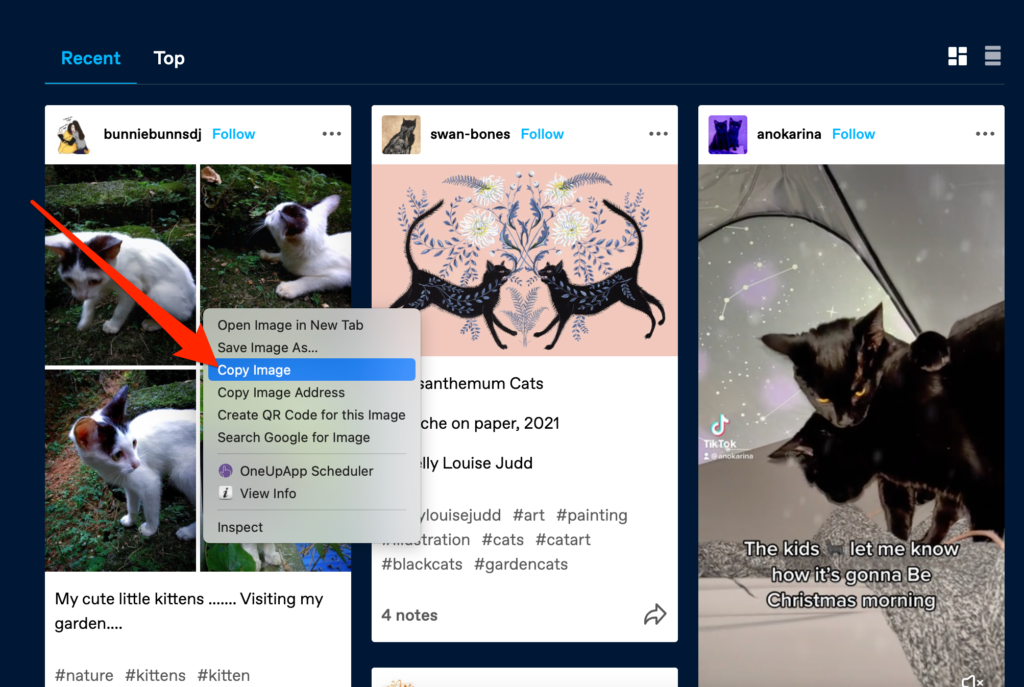
Just go to Tumblr and right-click and click “Copy image” on any image you want to move to Instagram:
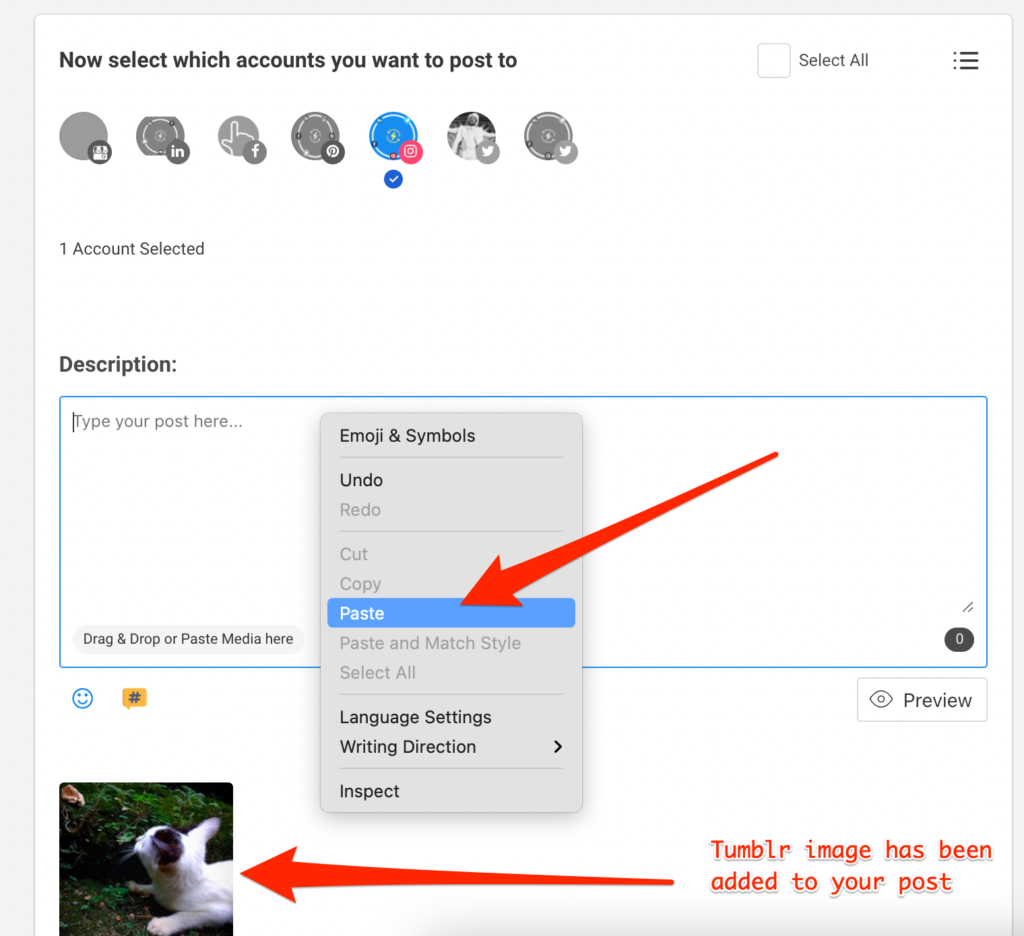
Then in OneUp, simply paste the image into the text box using Cmd+V or Ctrl+V (or you can right-click in the text box):
Then type in your post’s caption, and you are ready to either schedule it or post it now:
In addition to Instagram, OneUp supports Facebook, Twitter, LinkedIn, Pinterest, and Google My Business (aka Google Business Profile).
OneUp supports hashtags and @tagging other users in the post description, as well as adding a first comment for Instagram posts.
OneUp also supports scheduling Instagram Stories as well.
You can check out OneUp here: OneUp (and yes, there is a free plan 😊)
OneUp is one of the only social media scheduling tools that supports scheduling Twitter threads.
To schedule your Twitter thread in OneUp, click “Schedule Twitter Threads” in the Schedule Post dropdown.
Then select your Twitter account, and start creating your Twitter thread.
To add another part to your Twitter thread, click the “+” button. You can add as many parts to your thread as you want, and just like on Twitter, you can add up to 4 images on each tweet in your Twitter thread.
You can add images to any of the tweets in the thread by clicking the image icon, and just like on Twitter, you can add a video, GIF, or up to 4 images in each tweet of your thread.
You can also add Alt Text to your images, just like on Twitter 😊
Once you’re finished, you can either post your thread now, or you can click “Schedule Post” to schedule your Twitter thread for the future.
OneUp makes it easy to schedule Twitter threads in advance.
To schedule your Twitter thread in OneUp, click “Schedule Twitter Threads” in the Schedule Post dropdown.
Click “Schedule Twitter Threads”
Then select your Twitter account, and start creating your Twitter thread.
To add another tweet to your Twitter thread, click the “+” button. You can add as many tweets to your thread as you want.
You can add images to any of the tweets in the thread by clicking the image icon, and just like on Twitter, you can add a video, GIF, or up to 4 images in each tweet of your thread.
You can also add Alt Text to your images, just like on Twitter 😊
Once you’re finished, you can either post your thread now, or you can click “Schedule options” to schedule your Twitter thread for a date and time in the future.
So while you cannot schedule Twitter threads in TweetDeck, OneUp makes it easy to schedule Twitter threads for the future.